
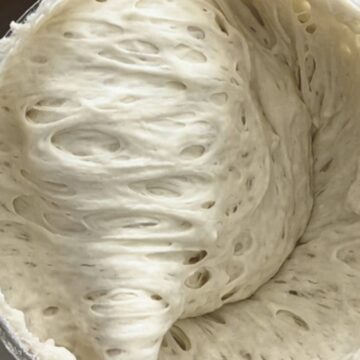
A sourdough starter is the heart of every loaf, capturing wild yeast and lactic acid bacteria from the environment. These microorganisms ferment the dough, producing natural gases that allow it to rise.
Unlike commercial yeast, which acts quickly and predictably, a sourdough starter imparts a complex, tangy flavor due to the acids produced by the lactobacillus.
The combination of wild yeast and bacteria creates diverse textures, from crisp crusts to chewy interiors.
It's this natural leavening process sets sourdough apart, making each batch unique to its surroundings and the care it receives.
I believe creating your own sourdough starter is easy and can be done by anyone because yeast and lactic acid bacteria are all around us.
Now, it does require patience, precision and attention to detail, especially the first couple of weeks while you are working to establish a strong sourdough starter.
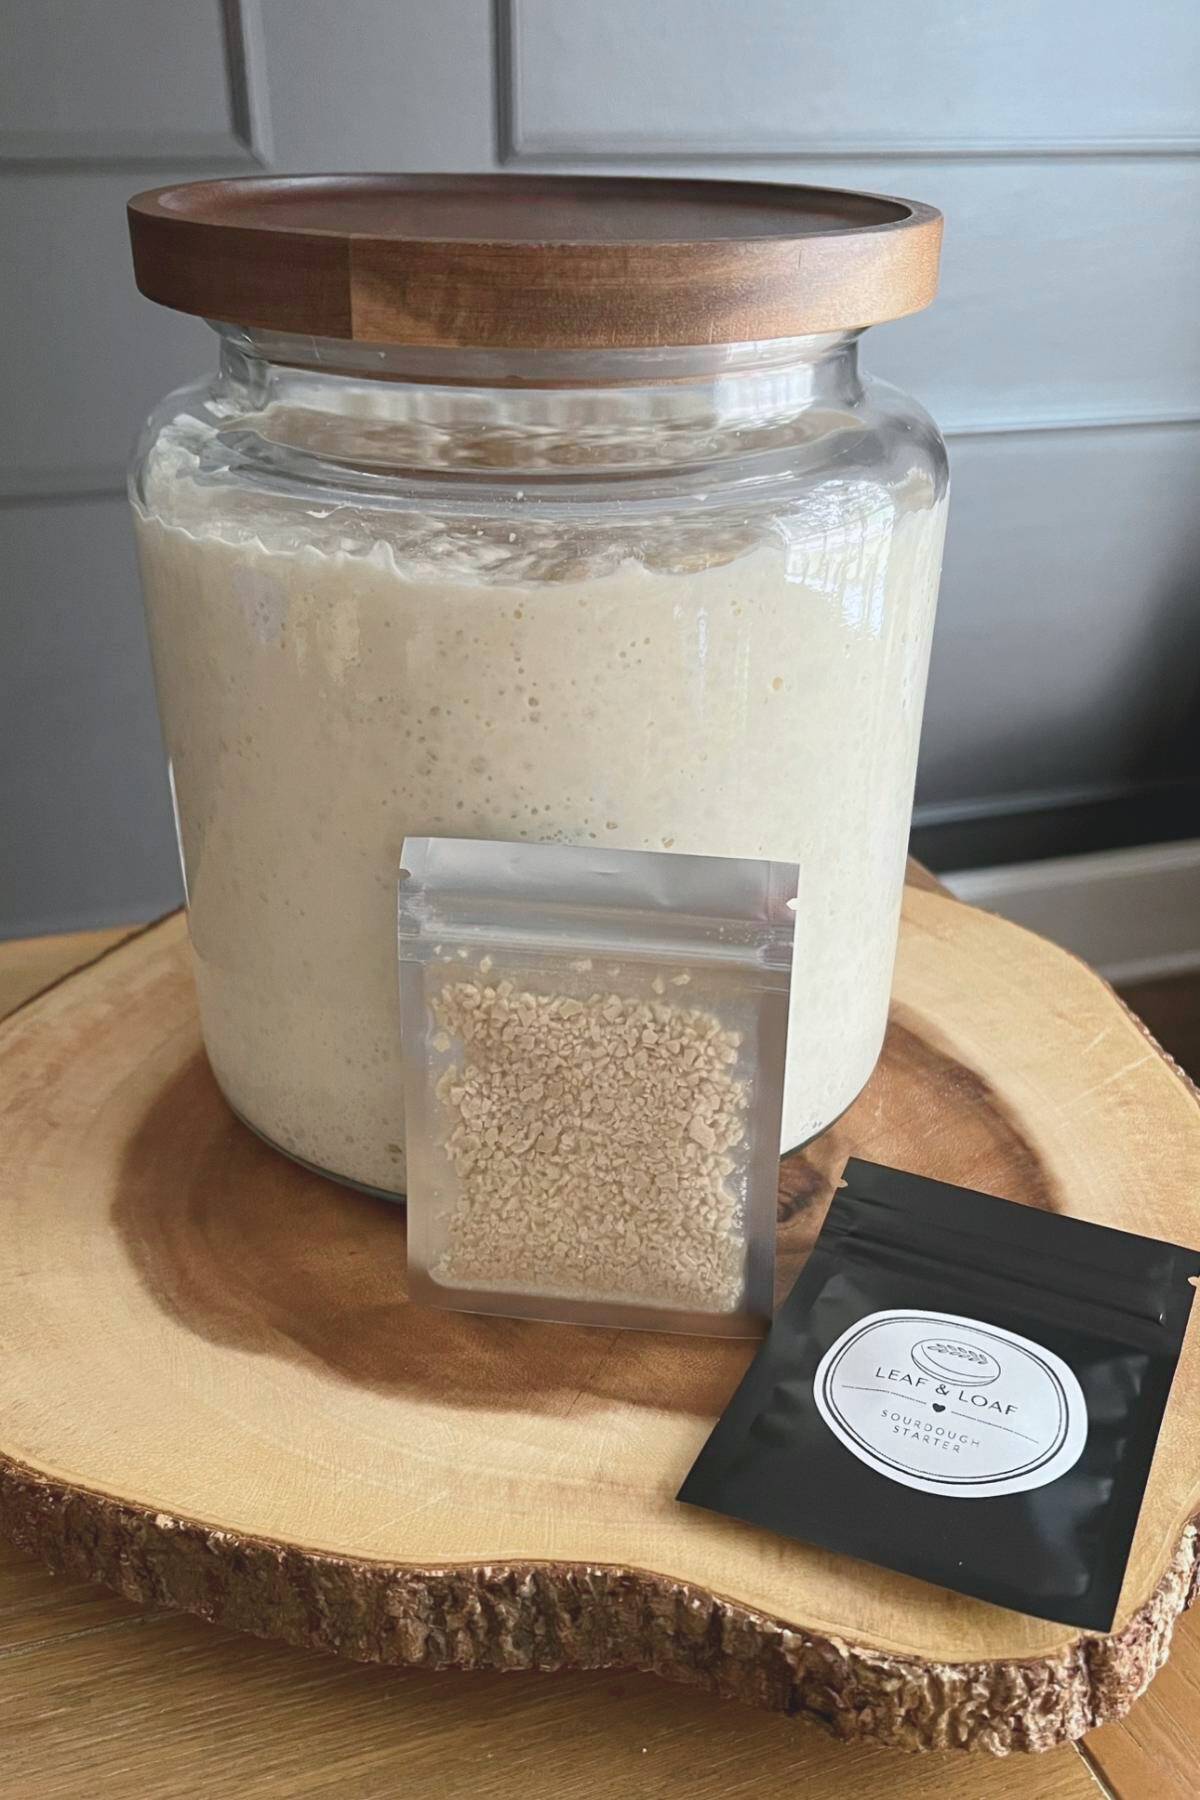
If you would like to fast-track your journey, you can purchase some of my sourdough starter, which comes with detailed feeding and maintenance instructions.
Get some of the very same sourdough starter I use to bake hundreds of loaves for my community
Jump to:
- What Makes My Sourdough Starter Method Work So Well
- Here's What Some Followers Have Said About My Sourdough Starter Recipe:
- Note For Sourdough Beginners
- Equipment Needed To Make Sourdough Starter
- Key Ingredients To Make Sourdough Starter
- Step by Step Tutorial On How To Make A Sourdough Starter From Scratch
- Day 1
- Day 2
- Day 3
- Day 4 - Day 9
- Sourdough Starter Storage
- Sourdough Starter Frequently Asked Questions
- Sourdough Starter Troubleshooting Guide
- How To Make Sourdough Starter In Bulk
- How To Make a Sourdough Starter From Scratch
- Related Recipes
- Subscribe to get my recipes
Over time, I have tweaked my own process to create a sourdough starter from scratch until I landed on this method, thanks to:
- my own hands-on experience and research reading from incredible bakers like Hendrik Kleinwächter, Addie Roberts, Trevor Jay Wilson, Tom Cucuzza and others.
- everything I've absorbed from my mom-a biology teacher passionate about living organisms and their extraordinary inner workings. Who, for as long as I can remember (and still to this day!) never stopped talking about them. This was especially true when we baked together. Gracias mamá!
What Makes My Sourdough Starter Method Work So Well
- Precise temperature control: I recommend keeping the starter in specific temperature ranges so the yeast and bacteria grow strong and stay in balance.
- Stirring often: To redistribute food, temperature, and microbes, knock down trapped CO₂, and keep fermentation more even. Stirring also helps letting oxygen in, which helps yeast build healthier cell membranes, supporting it's growth and resilience.
- Feeding ratio matches starter size: In my method, I recommend adjusting the feeding ratio to match how big and strong the colony is, so it always has enough food without being diluted.
- Bread flour for strength and activity: I like using bread flour because its higher protein and natural enzymes (often from malted barley) help create a strong, bubbly, reliable starter.
Here's What Some Followers Have Said About My Sourdough Starter Recipe:
It took a few days like it says in your recipe but the bread turned out so great!! Thank you! - Brooke Riley
I wasn't expecting this to work right away, but it did! My very first bread was amazing and everyone in the family loved it so much! I can't wait to bake again with it! - Nadia M
Note For Sourdough Beginners
Before we dive in, let's start by discussing some facts you must know about sourdough starters:
- A sourdough starter is a colony of living microorganisms: wild yeast and lactic acid bacteria.
- They are literally "everywhere", they are already in the jar, in the spatula, in the flour, in the water, in the air, so believe me when I say they will find their way into your jar.
- Just like any living organism, your starter needs certain things to thrive. Just like you need to eat good food to feel your best, fresh air, protect yourself from intense heat and cold and make yourself cozy at the right temperature you prefer, etc, your sourdough starter needs you to:
- Not let it go hungry too long. It gets hangry (hungry + angry) don't we all?
- Feed it good flour and filtered water, and just the right amount of it.
- Remember to use lukewarm water for feedings. Never feed it cold water from your fridge filter (warm it up slightly) or super hot water that can kill your little colony.
- Give it a good stir when mixing and then again later in the day to get things moving and let some oxygen in (ah! fresh air!).
- Keep it cozy. Wild yeast and beneficial bacteria thrive in warm environments.
- Never put a new or young starter in the fridge. Wait at least 2 weeks or longer if you can for best results, keeping it at room temperature.
- Put it away from sunny windows where the UV rays can destroy the beneficial bacteria.
- Keep things clean. Clean the top of the jar after every feeding, use a clean spatula every time, remember to cover it loosely, and change the jar often.
Every single time, when I hear from someone who is struggling to create their own starter or even keeping alive one they bought, we find out they didn't treat their starter like the very unique living organism it was.
Now, I also want you to know that sourdough starters are incredibly resilient, once they are well established, strong, and healthy.
- If you use cold water one day, it's ok.
- If you fed it a few hours later, it's ok.
- If you fed it before it had fully peaked, it's ok.
- If you forgot it in the fridge too long, it's ok.
Just don't do it all the time, all right? And as soon as you realize the mistake, try to be extra loving to your starter for a few days. It will bounce back just as happy as it once was. I promise.
Equipment Needed To Make Sourdough Starter
- A digital scale ( or a set of cups and spoons will work fine, as well)
- Two clean glass jars with lids
- A clean silicone spatula or wooden spoon
Key Ingredients To Make Sourdough Starter
- Organic bread flour, 13% or higher in protein content, not bleached, enriched, or bromated.
You can use any kind of flour, including all-purpose flour (as I often do) as long as it is organic, not bleached, enriched, or bromated.
Please visit my blog post where I explain the best flour to create and feed your sourdough starter with, why I recommend bread flour or a simple, organic, minimally processed flour, and the impact different flours will have in your sourdough starter and resulting loaf of bread.
Keep in mind that different flours will give you different results and need to be fed differently. For the method I explain below, I recommend you use bread or all-purpose flour for best results.
- Lukewarm filtered water (not reverse osmosis or distilled)
Lukewarm filtered water is ideal for a sourdough starter because it's free of chlorine and other tap water chemicals that can inhibit yeast and bacterial growth.
Avoid reverse osmosis or distilled water as these are stripped of essential minerals that microbes need to thrive. A little mineral content helps nourish the starter and keeps fermentation active and balanced.
And just like we said above, use lukewarm water, not hot or cold.
See recipe card for quantities.
Step by Step Tutorial On How To Make A Sourdough Starter From Scratch
Day 1
In the morning:
Combine Water and Flour
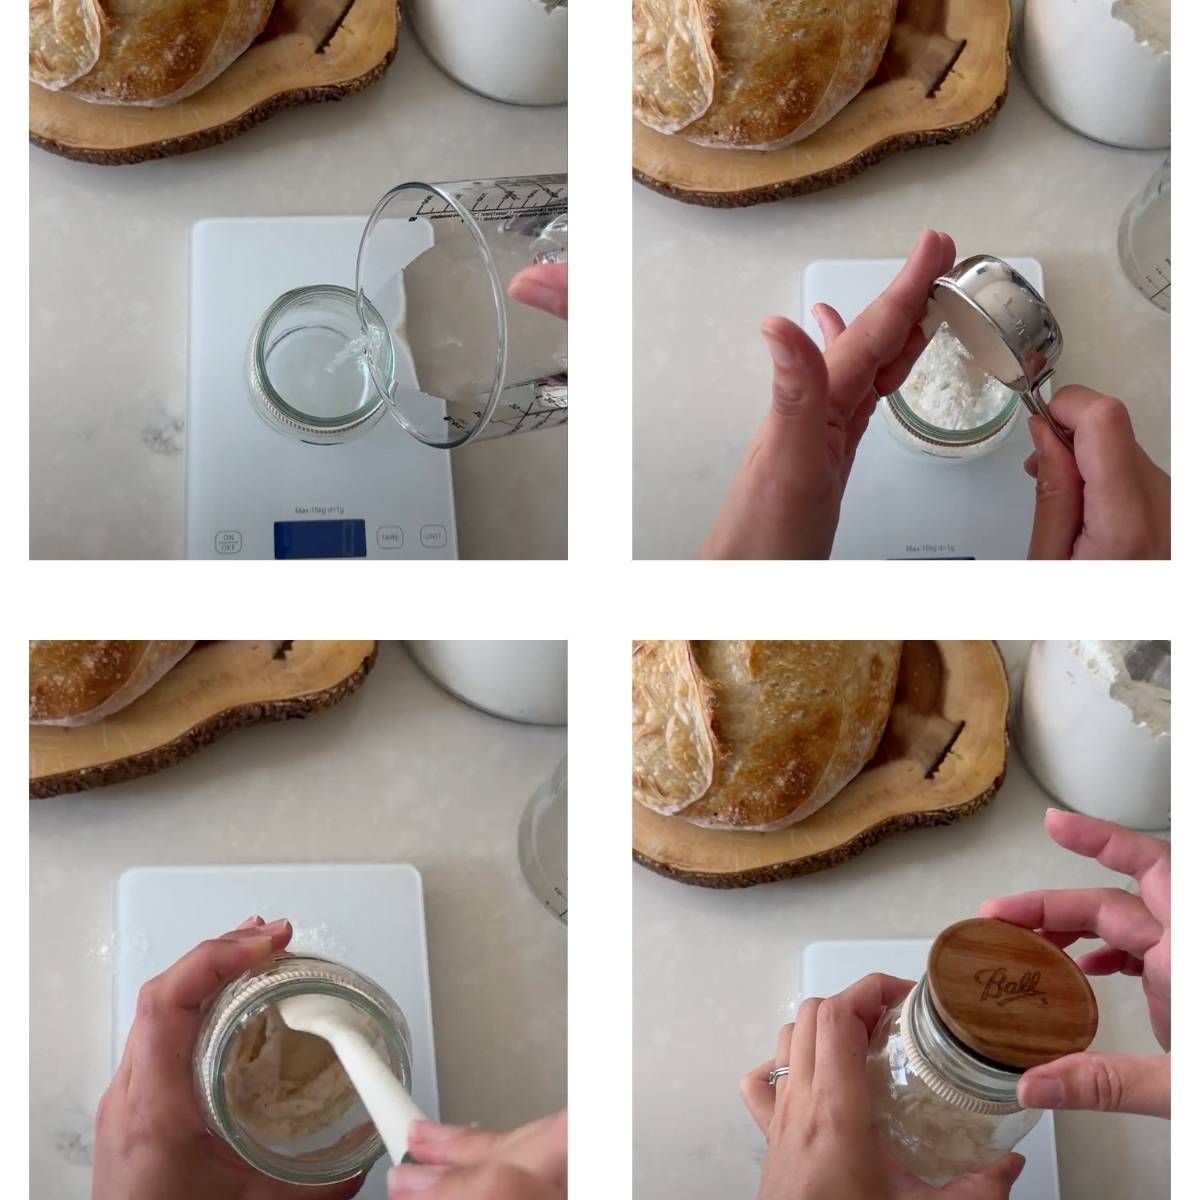
Combine 10 grams (2 teaspoons) of filtered water with 10 grams (1 tablespoon) of flour in a clean jar.
Stir it well until all the flour is hydrated.
Cover the jar with a lid and keep it in a warm place around 85°F (29°C).
- The oven off with the light on is a great place for this. Do not place it by a sunny window.
That's it for now! It's time to start thinking of a name for your sourdough starter!
The wild yeast and lactic acid bacteria (LAB) are already present in the flour and the air. When you mix flour and water, you're creating the perfect conditions for them to wake up, feed, and multiply. This is the beginning of your sourdough ecosystem.
In the evening:
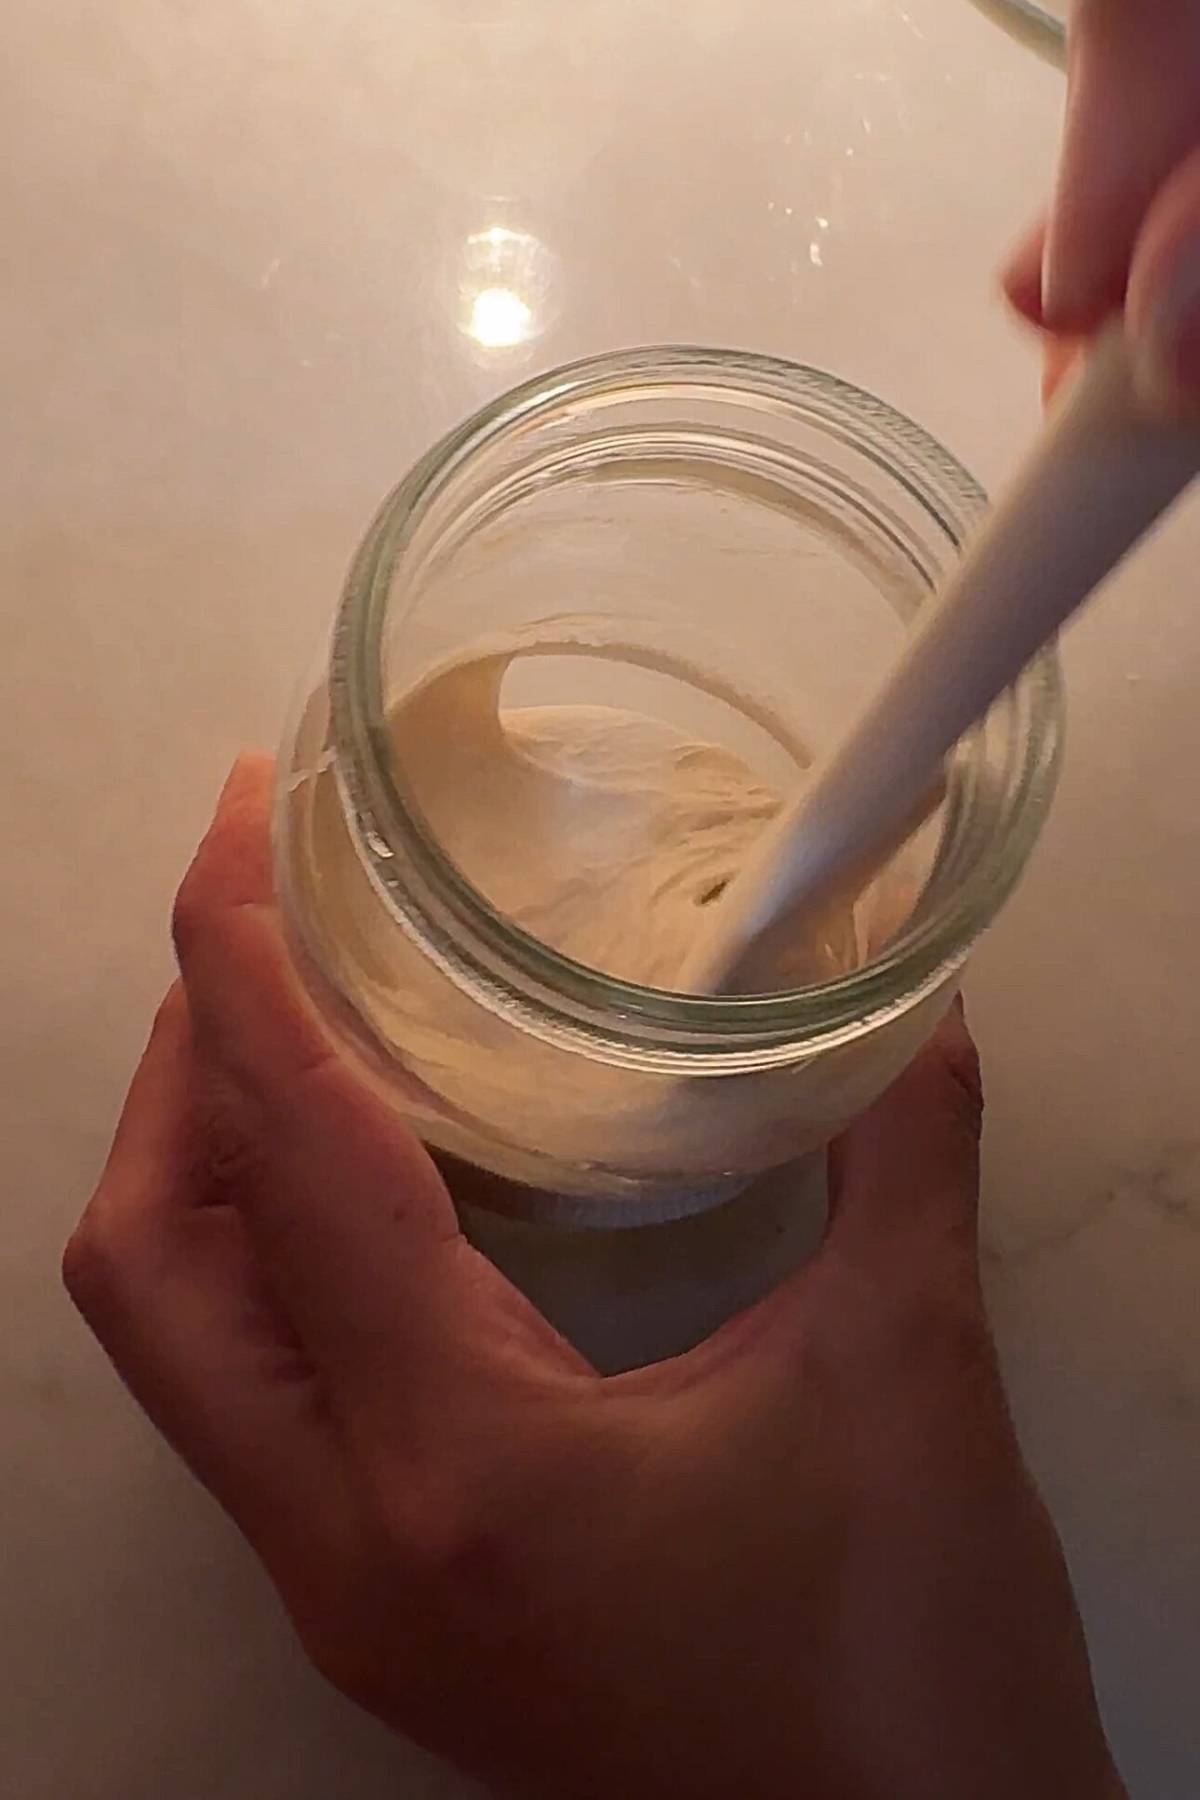
Stir
Stir it gently to even out the temperature, spread fresh food through the mix, and release trapped CO₂. This keeps fermentation steady, gives the yeast a little oxygen for stronger cell health, and moves the microbes around so they can reach every bit of food available.
It should feel light and thin.
At this time, there is a very small amount of yeast and bacteria, so no need to feed it until the following morning.
Day 2
In the morning:

Discard and Feed
Remove 10 grams (2 teaspoons) of the mixture and place it in your "discard jar". Below I'm showing you mine.
This leaves 10 grams (2 teaspoons) of mixture in your starter jar.
To your starter jar, add 10 grams of flour (1 tablespoon) and 10 grams (2 teaspoons) of water and mix.
Cover the jar with a lid and keep it in a warm place around 85°F (29°C).
This is a 1:1:1 feeding ratio (10 grams (2 teaspoons) of starter + 10 grams (1 tablespoon) of flour + 10 grams (2 teaspoons) of water). The colony of yeast and bacteria is tiny, so no need to feed at a higher ratio just yet.
Use a rubber band: After each feed, use a rubber band to mark the starting point of your starter, so that you can track its growth.
6 hours later check on it. It should have some activity. Stir it gently. It should feel light and thin.

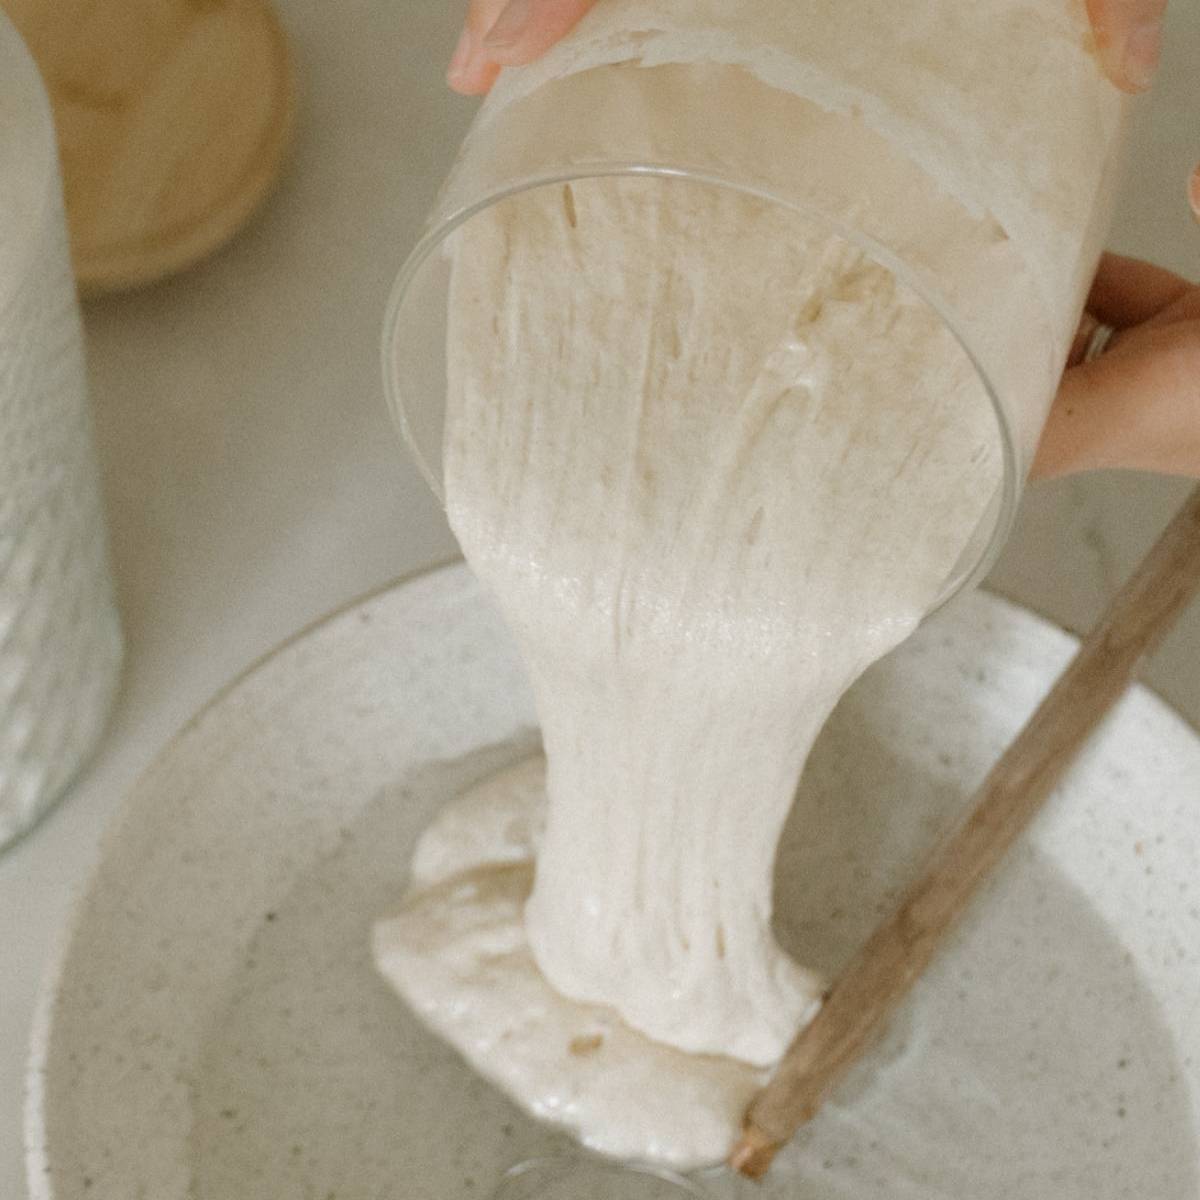
Create a Discard Jar
Discard is basically sourdough starter that you are not feeding.
We discard part of our sourdough starter, so that the total amount we keep active is small and manageable.
Add all of your discard to a jar you keep in the fridge. Use it for recipes like waffles, pancakes, brownies, cookies, etc.
I try to use what's in my discard jar every week, so it doesn't get too acidic.
In this picture you can see a discard jar I left out of the fridge for a few hours before I was ready to make something with it. It was still pretty active and happy to be back to room temperature. I think it's so beautiful, pasta sauce labels and all.
In the evening, once you see your starter is not growing anymore and it has actually deflated a bit and started to fall back down:
Discard and Feed
Remove 20 grams (4 teaspoons) of the mixture and place it in your discard jar.
This leaves 10 grams (2 teaspoons) of mixture in your starter jar.
To your starter jar, add 10 grams (1 tablespoon) of flour and 10 grams (2 teaspoons) of water and mix.
Cover the jar with a lid and keep it in a warm place around 85°F (29°C).
Important: Only feed it again once it has risen a bit and started to deflate. If you didn't see any activity, then wait the full 24 hours and feed it again in the morning of Day 3.
Overfeeding during this stage is a common mistake. The colony of microorganisms is still small and will get further diluted among all the fresh food, so it will take it longer to use it and for you to see fermentation activity.
Day 3
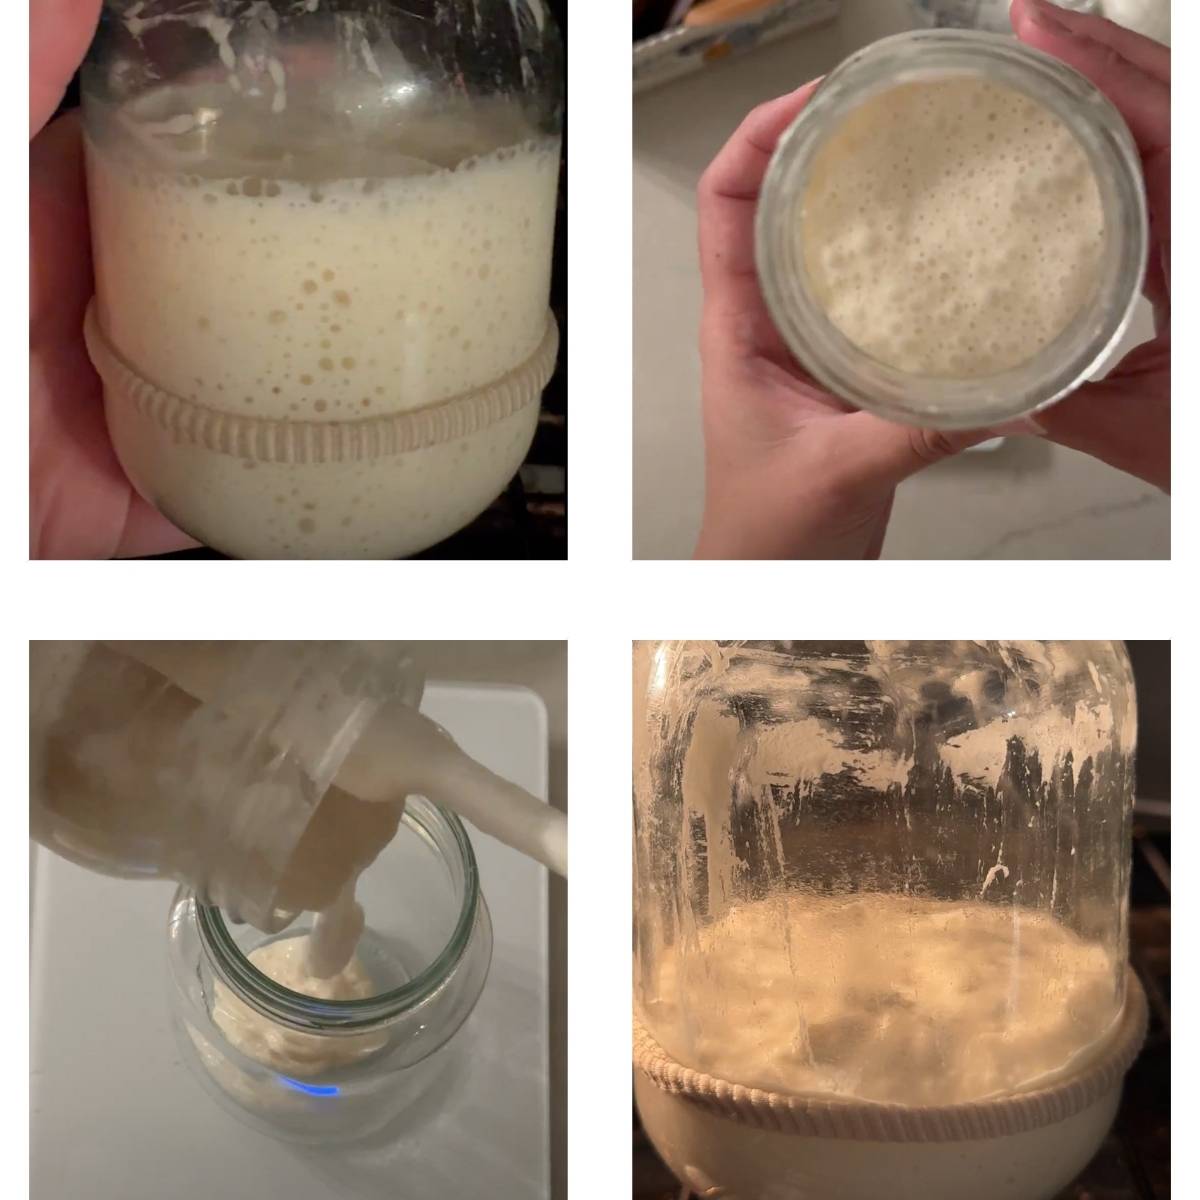
You might start to see more activity: some tiny bubbles on the top and the sides of the jar and even some rise.
In the morning:

Discard and Feed
Remove 20 grams (4 teaspoons) of the mixture and place it in your discard jar.
This leaves 10 grams (2 teaspoons) of mixture in your starter jar.
To your starter jar, add 10 grams of flour (1 tablespoon) and 10 grams (2 teaspoons) of water and mix.
Cover the jar with a lid and now start keeping your starter around 80°F (27°C), perhaps around a lamp.
6 hours later, stir it gently.
In the evening, once you see it's not growing anymore and it has actually deflated a bit, discard and feed using a 1:1:1 ratio
Discard and Feed
Remove 20 grams (4 teaspoons) of the mixture and place it in your discard jar.
This leaves 10 grams (2 teaspoons) of mixture in your starter jar.
To your starter jar, add 10 grams of flour (1 tablespoon) and 10 grams (2 teaspoons) of water and mix.
Cover the jar with a lid and keep it in a warm place around 80°F (27°C).
Around this time you might encounter something known as False Rise. This is when the starter doubles or even triples in volume, and looks very bubbly and active, so you might think it's ready to bake with.
But it has a strange smell (like sweet, cabbage-like or funky) instead of the pleasant tangy smell of a sourdough starter. It's runny and foamy, and it goes completely flat if stirred.
These are signs of overgrowth of the Leuconostoc bacteria, commonly present in the early days of a new starter. It produces gas (CO2) and causes bubbling and rising, even though the colony of wild yeast, the one typically responsible for the development of CO2 gases during fermentation, is fairly small.
That bacteria is harmless and will eventually die off as the starter becomes more acidic by gathering more lactic acid bacteria (LAB) from the environment.
Continue to feed your starter at a 1:1:1 ratio and keep it warm and the starter could overcome the false rise in as little as one day.
Day 4 - Day 9
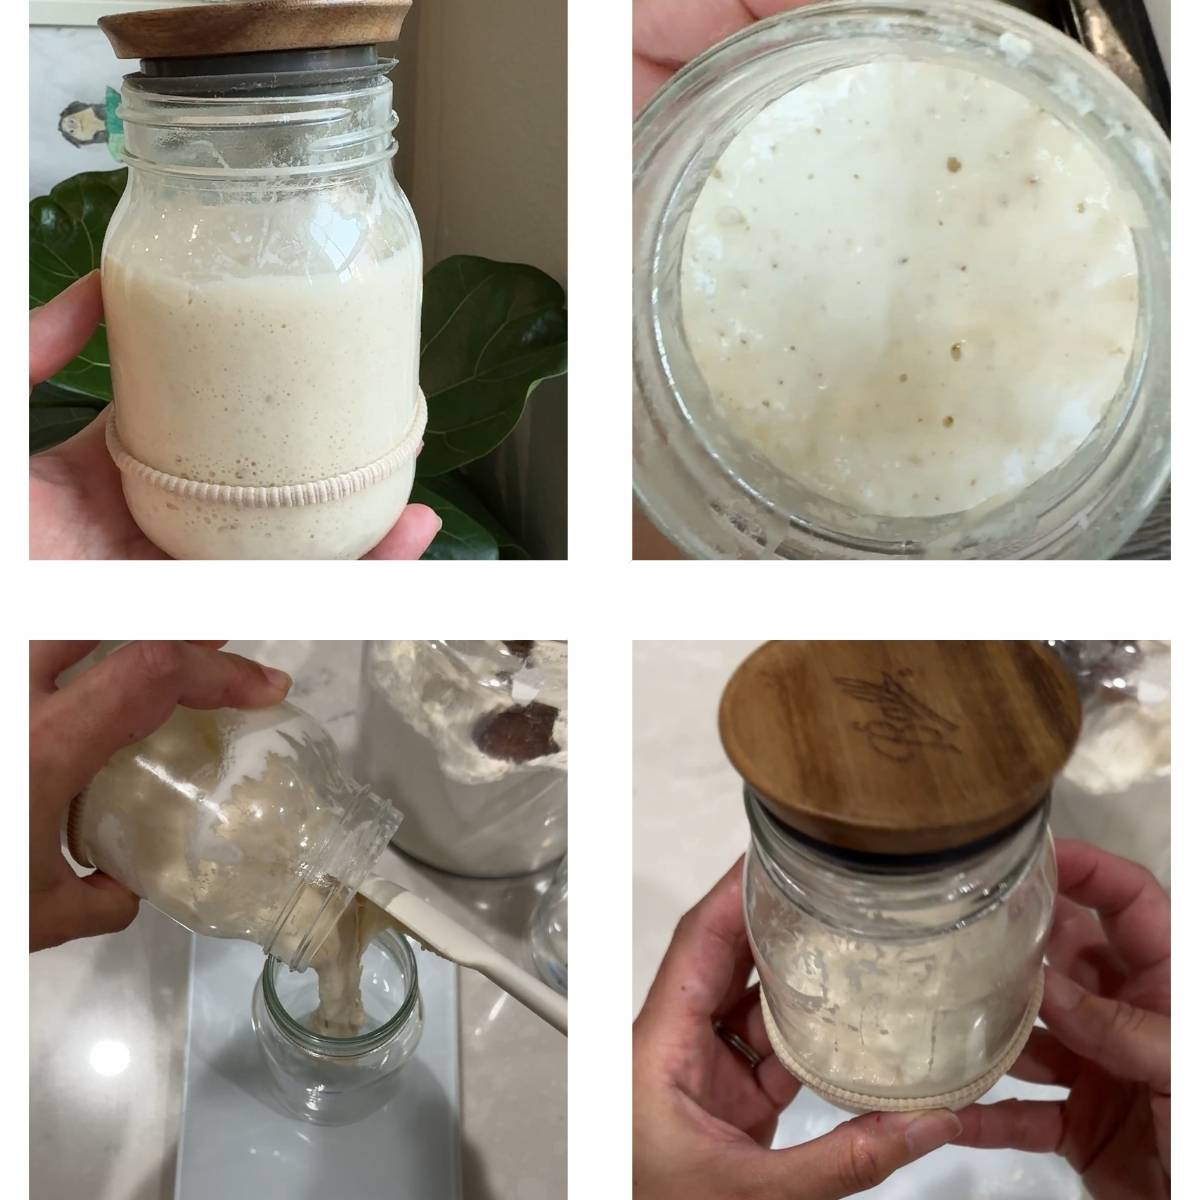
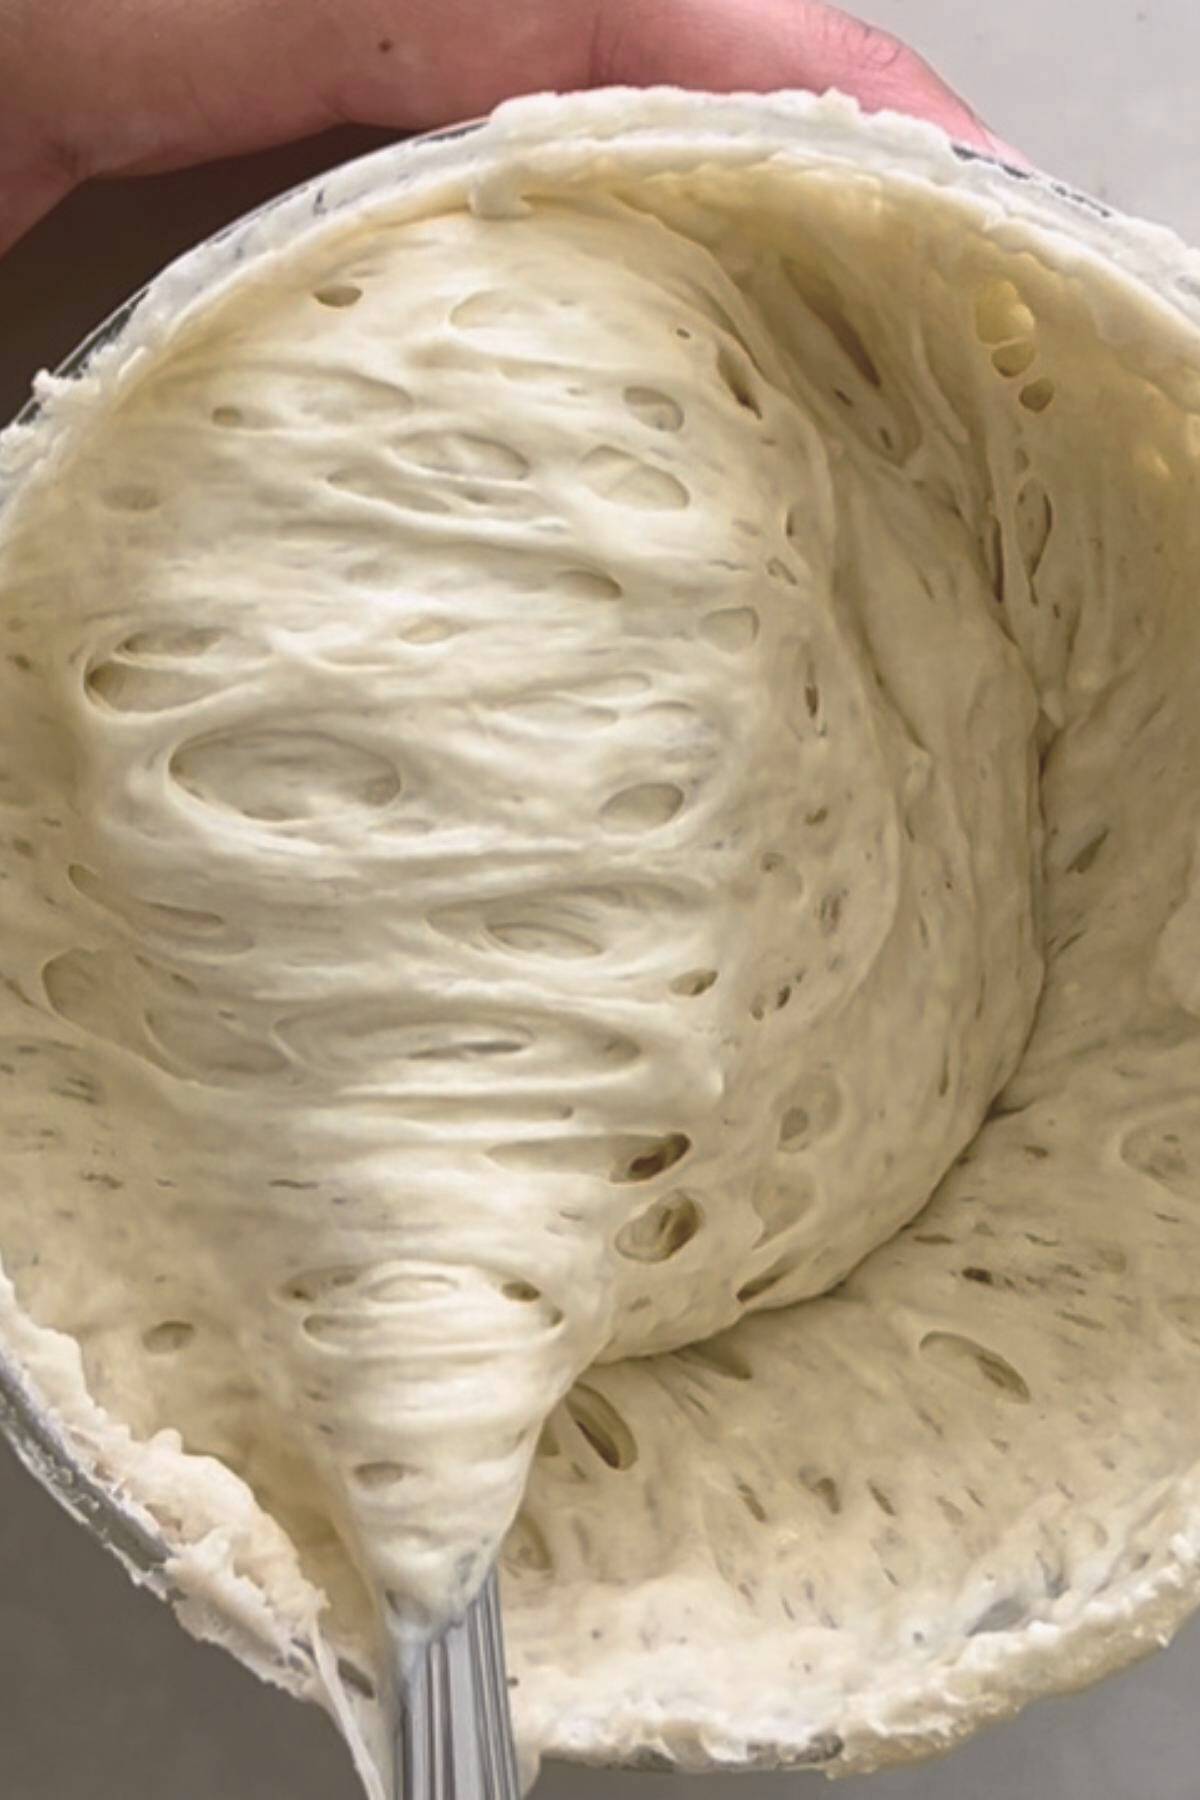
Around day 4, once your sourdough starter overcomes the false start, you will start seeing more activity: bigger bubbles and more rising and it should start smelling less like flour and more tangy and slightly sour, with subtle notes of vinegar or yogurt from the lactic acid. There may also be hints of fruity sweetness or overripe fruit, along with a yeasty, bread-like aroma.
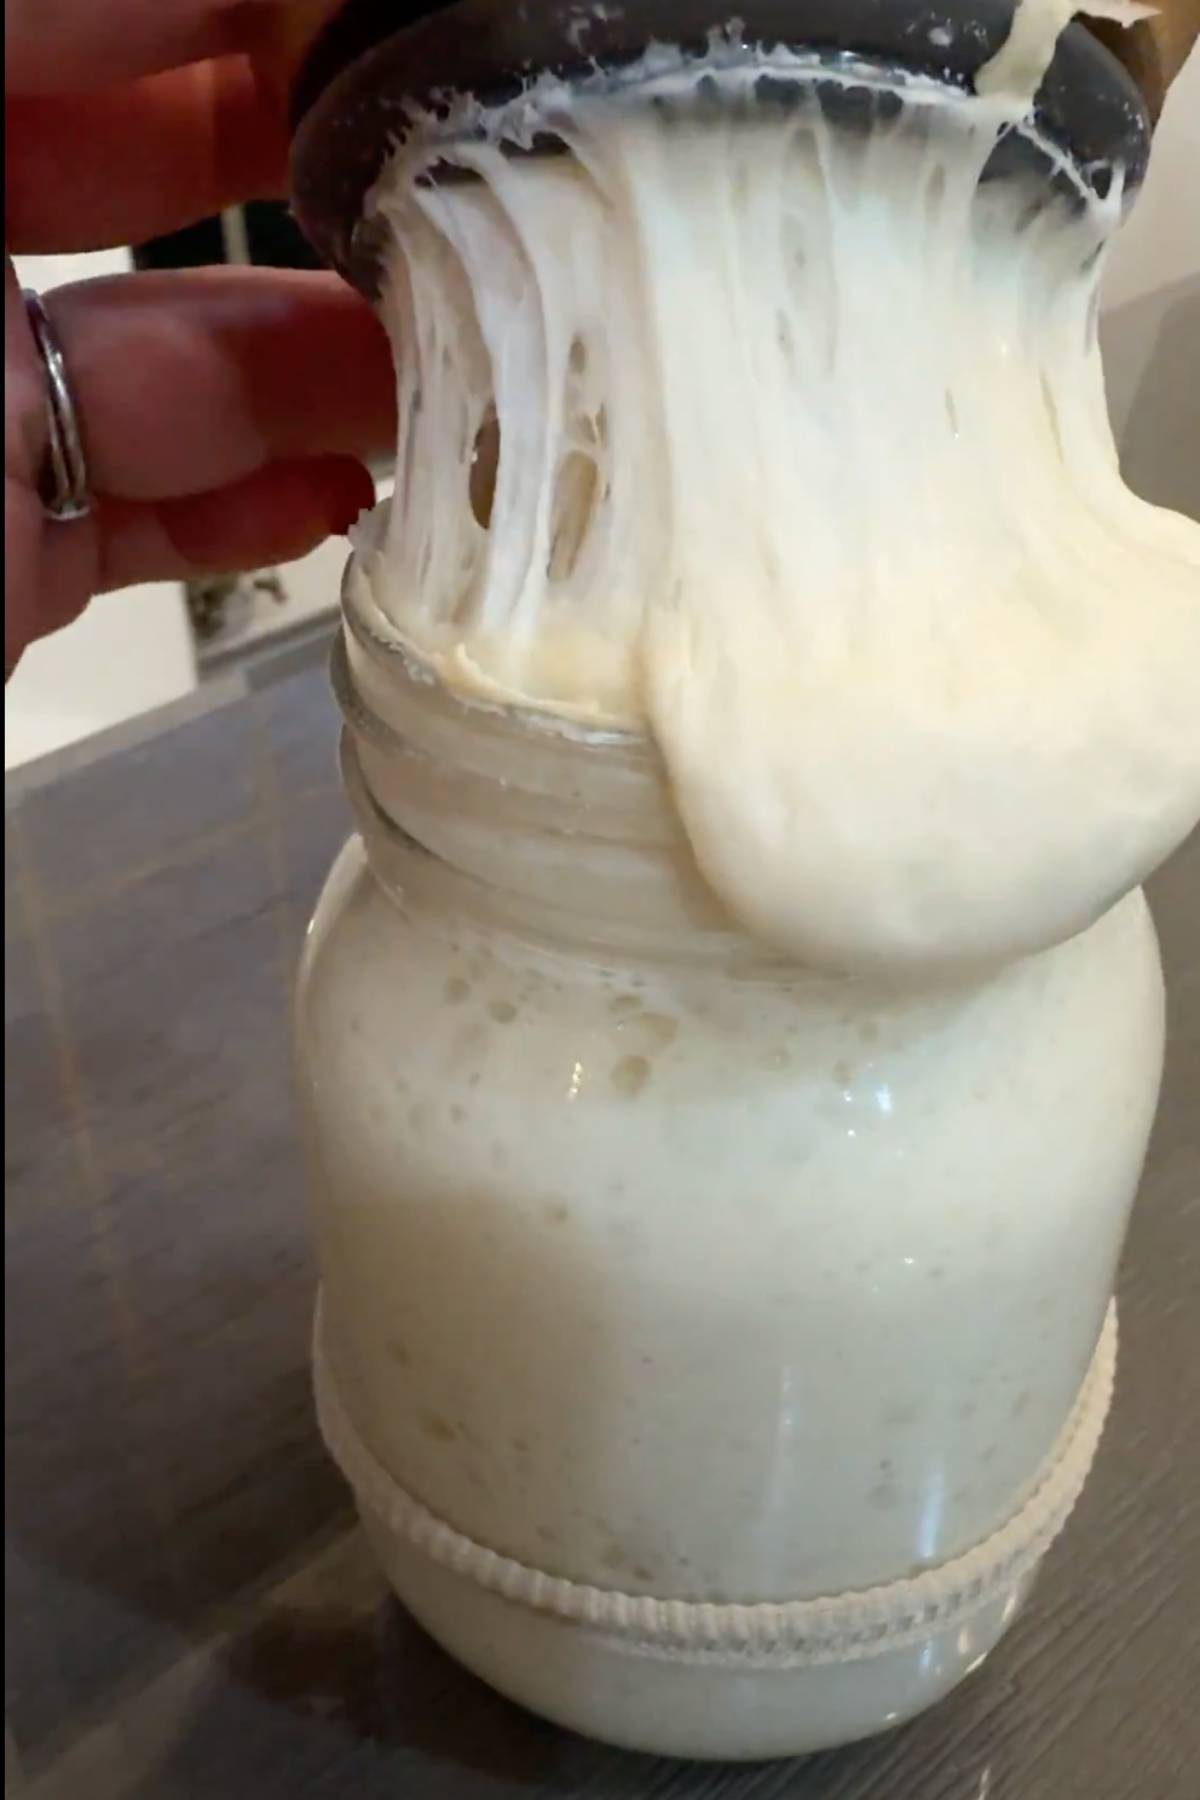
You might also notice that your starter is rising more vigorously and falling more drastically than before. Even though it does that, the starter is less runny, but instead it's thicker and it clings to the walls of the jar a little more when you move the jar around.
You starter is becoming more balanced and the gluten proteins can tighten and bind more, which gives the starter a thicker, clingier texture.
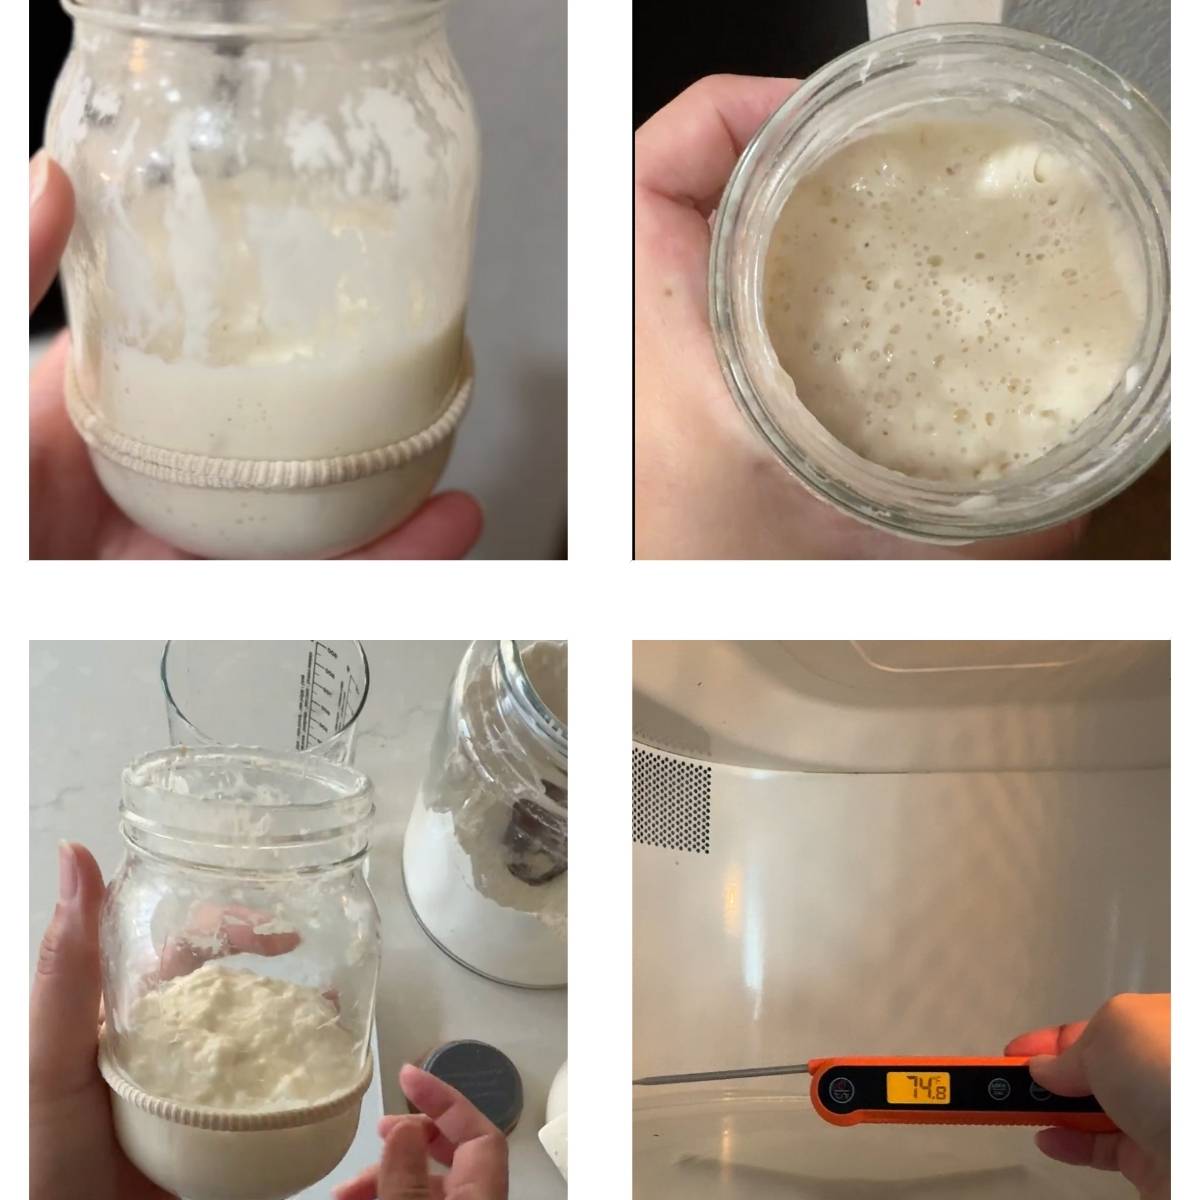
Those are all good indicators telling you it's time to start feeding your sourdough starter more food. Increase the feeding ratio to 1:2:2 and start keeping it at room temperature, around 75°F (24°C).
My kitchen is usually around 72°F (22°C), so I would keep it inside the microwave where it is around 75°F.
Discard and Feed
In the morning, discard 25 grams (5 teaspoons) and leave only 5 grams (1 teaspoon) of mixture in your starter jar. This will ensure we bring as little acidity as possible from day 3.
Feed using a 1:2:2 ratio by adding 10 grams (1 tablespoon) of flour and 10 grams (2 teaspoons) of water and mixing.
Cover the jar with a lid and keep it around 75°F (24°C).
6 hours later check on it. It could have risen, even doubled, but it's not ready to bake with yet. Stir it gently.
By the evening, your starter should have risen, peaked and started to fall back down.
Discard and Feed
In the evening, discard 20 grams (4 teaspoons), leaving 5 grams (1 teaspoon) in your starter jar.
Feed using a 1:2:2 ratio, adding 10 grams (1 tablespoon) of flour and 10 grams (2 teaspoons) of water and mixing.
Cover the jar with a lid and keep it at room temperature, around 75°F (24°C).
I hope that by now your sourdough starter is beginning to look like it's ready to bake with, and technically it is ready, and you could bake with it, but please trust me on this one:
The colony of yeast and bacteria is still small and still likely out of balance. Rushing to bake with it might not give you the great results you might be expecting.
Sometimes, people might bake with a Day 4 or even a Day 7 sourdough starter and get a bad loaf of bread. They might blame the recipe or their lack of skill, when in reality they just used a weak starter.
Do Not Put Your Young Starter In The Fridge!
The cold temperature will slow down the metabolic activity of the yeast and bacteria. In that process, some will die.
This is ok to do with a well established sourdough starter that has a large presence of yeast and bacteria, but for a young starter, with a developing colony, it might mean you have to practically start over!
Day 10 - Day 14
The colony of yeast and bacteria should be stronger now, so it's time to start feeding it more. Increase the feeding ratio to 1:4:4
Discard and Feed
In the morning, discard 20 grams (4 teaspoons) and leave 5 grams (1 teaspoon) of mixture in your starter jar.
Feed using a 1:4:4 ratio by adding 20 grams (2 tablespoons) of flour and 20 grams (4 teaspoons) of water and mixing.
Cover the jar with a lid and keep it between 70-75°F (21°C-24°C).
6 hours later check on it. It should have risen, doubled or even tripled.Stir it gently.
By the evening, your starter should have risen, peaked and started to fall back down.
Discard and Feed
In the evening, discard 40 grams (8 teaspoons) and leave 5 grams (1 teaspoon) of mixture in your starter jar.
Feed using a 1:4:4 ratio by adding 20 grams (2 tablespoons) of flour and 20 grams (4 teaspoons) of water and mixing.
Cover the jar with a lid and keep it between 70-75°F (21°C-24°C).
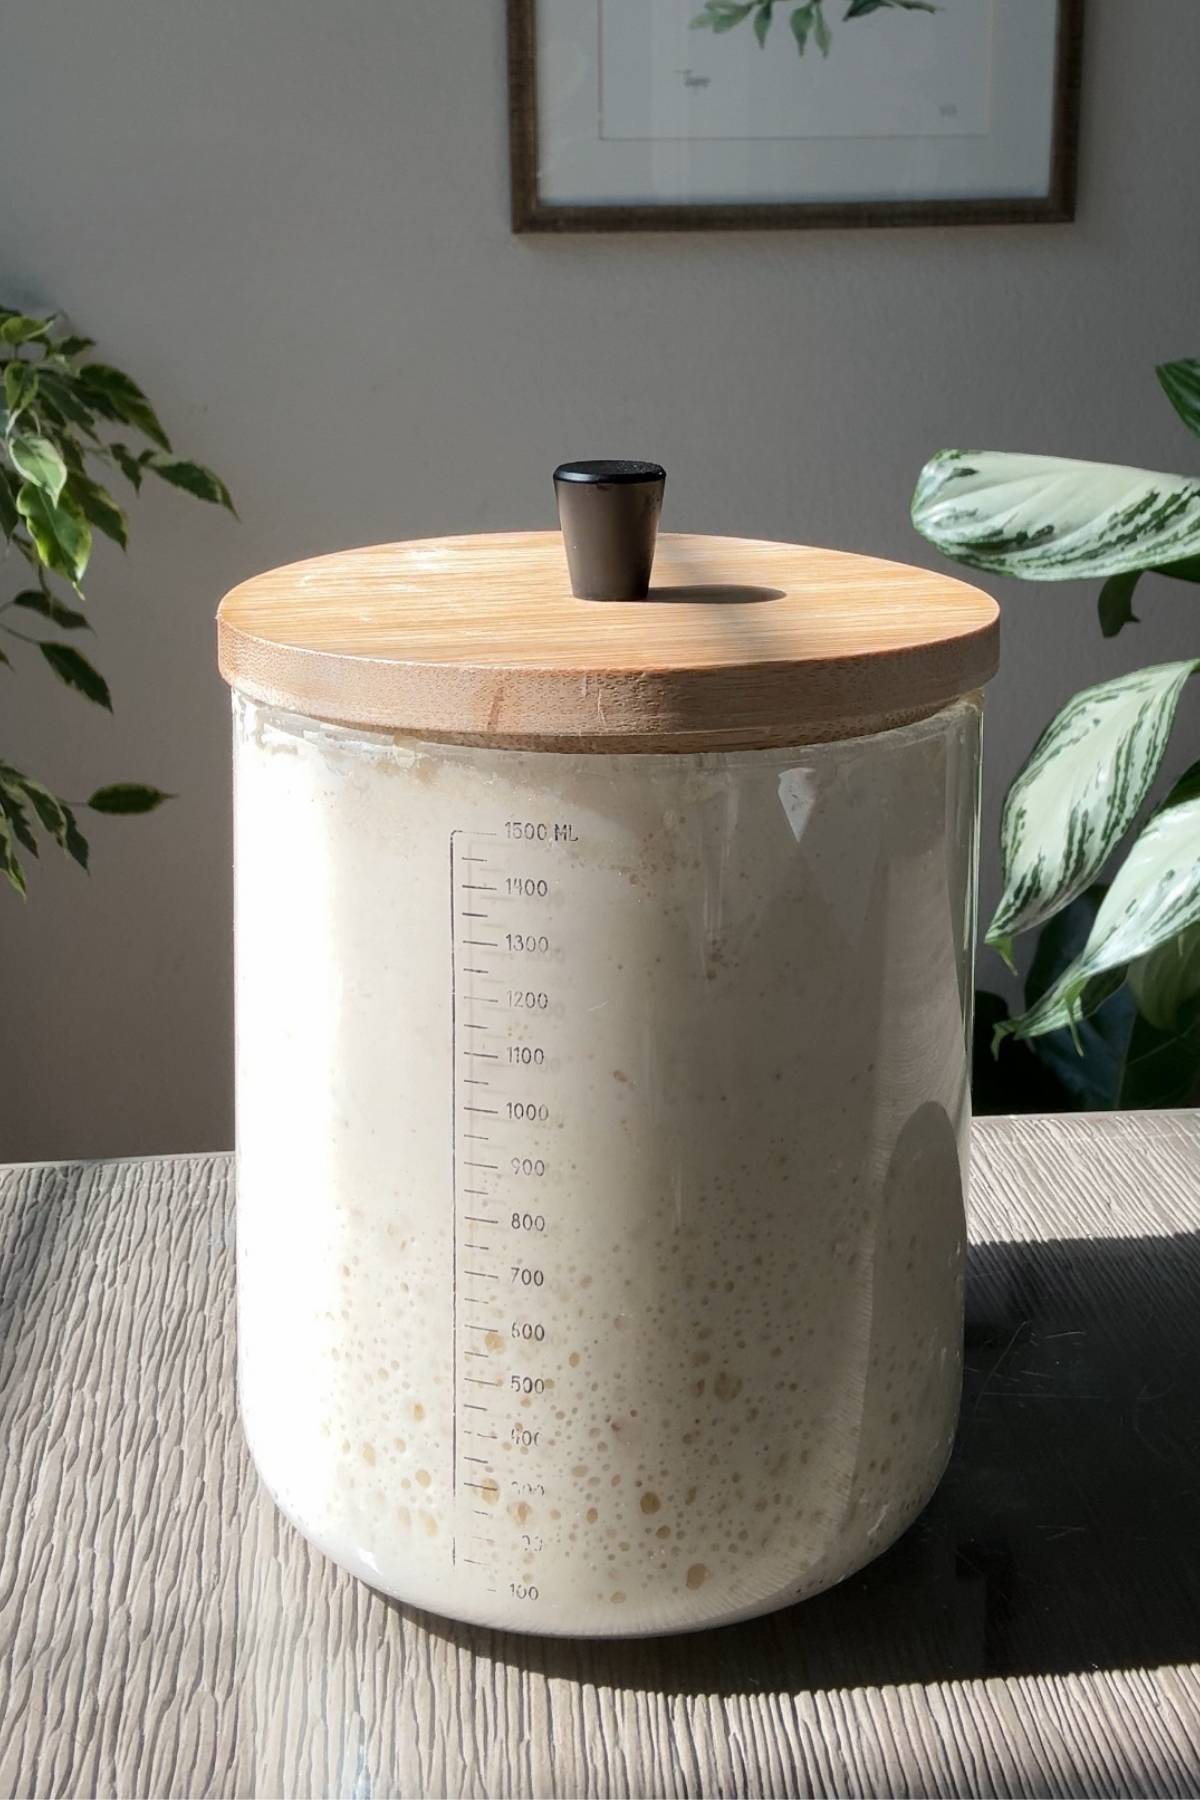
Maturation
By the end of the second week, your starter should be bubbly, doubling or more after each feeding, have a pleasant tangy smell, and be ready to use or store for future baking. Do not use before two weeks for best results.
Learn more about feeding ratios and time to peak
Use at Peak
You can use it to bake bread once it has peaked after a feeding. Depending on the feeding ratio and the environment temperature and humidity, it will take 4-14 hours (4-6 hours for a 1:1:1 feeding and 9-12 hours for a 1:10:10 feeding).
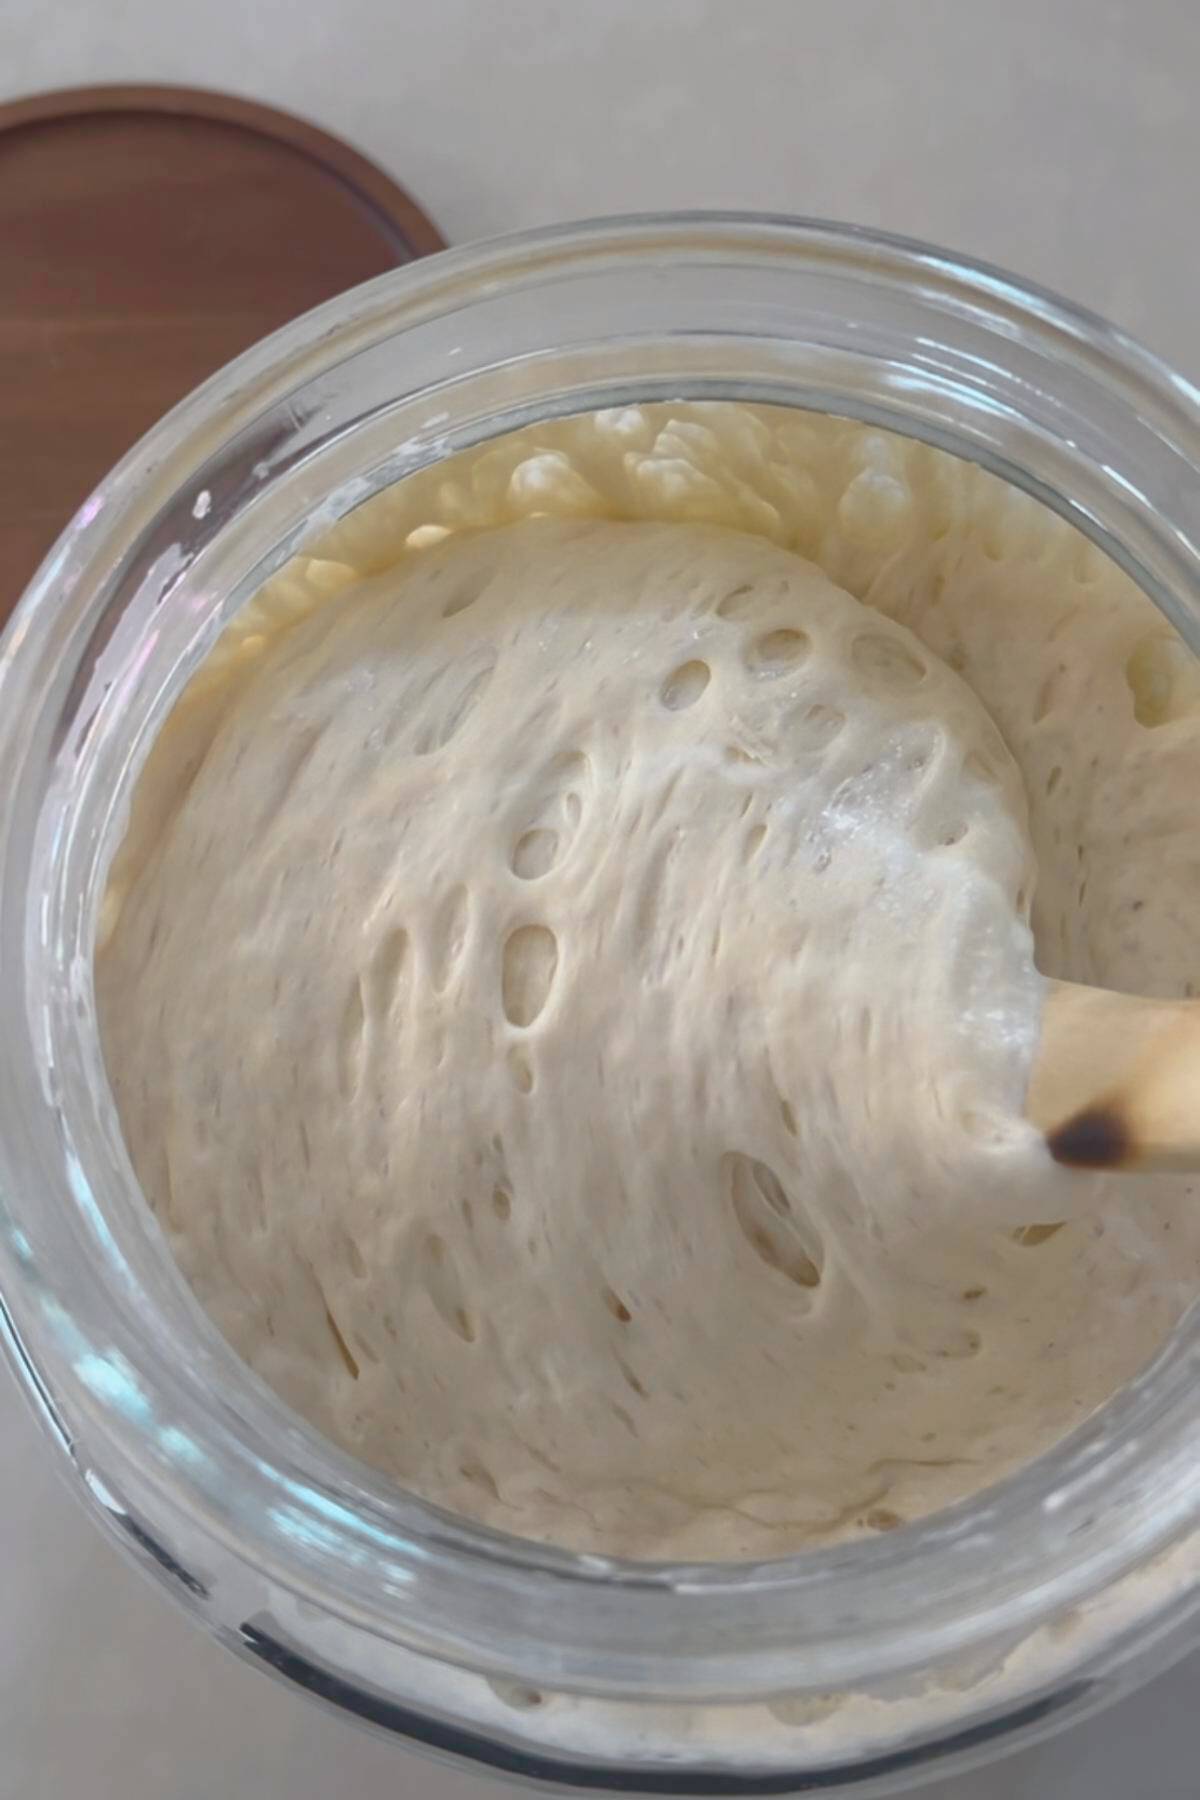
When your sourdough starter has reached its peak, the top won't be domed or convex (which would indicate is still rising), but instead, the top will look flat or slightly concave, and it might have started to fall back down slightly, which you can determine by looking at the residue left on the sides of the jar.
Sourdough Starter Storage
You can store your sourdough starter two ways. Choose the method that fits your baking rhythm-and switch anytime!
- At room temperature if you're baking often (daily or every other day). This keeps it active and ready to go, but it will need regular feedings-usually twice per day.
- In the fridge if your sourdough starter is well established and you need a break or only bake once a week. The cold slows down fermentation, so you'll only need to feed it about once a week. Just let it come to room temp and feed it a couple of times before baking with it again.
Sourdough Starter Frequently Asked Questions
Yes! A gluten-free starter is built the same way as a regular one: just flour and water. But you'll need to use a gluten-free flour that contains natural starches and some wild microbes-think brown rice flour or sorghum. These work best because they still have the nutrients and structure that wild yeast and bacteria need to thrive.
It won't have gluten, so the structure in your bakes will come from other ingredients like psyllium husk, xanthan gum, or flax gel.
If you're gluten-sensitive or celiac, make sure to avoid cross-contamination by using dedicated tools and containers.
If you skip the midday stirring, your starter will still form-but it might not thrive quite as well. Stirring adds oxygen, which wild yeast especially needs during its active growth phase. It also helps redistribute food and microbes throughout the mixture, keeping things balanced and encouraging a more even fermentation.
Think of it like aerating compost or turning soil-technically optional, but it supports a healthier, more vigorous ecosystem.
In the early days, warmer temps around 85°F (29°C) help jumpstart the starter by favoring wild yeast reproduction and speeding up microbial growth. This gets fermentation going quickly and helps establish a strong foundation.
As the starter matures, gradually lowering the temperature to 75-70°F (24°C-21°C) encourages the growth of heterofermentative lactic acid bacteria-the ones responsible for better flavor complexity, aroma, and long-term microbial balance. It's a strategic warm-to-cool curve to build strength first, then depth.
No. Early doubling can be a false start, usually driven by gas from fast-growing bacteria-not a reliable sign of yeast strength. Even if there's some yeast activity, the colony is still small and won't have the leavening power or flavor depth of a mature starter. Keep feeding it on schedule-the real magic comes with time.
Not if it's still young. Cold temps slow down microbial activity, and in a young starter, that can stall development or even kill off part of the small yeast and bacteria population.
For a mature, well-fed starter with an established colony, refrigeration is fine-but putting a new starter in the fridge too early can set you back days or force you to start over. Keep it warm and active until it's strong enough to chill
You can absolutely feed a starter without a scale by using spoons and aiming for a thick, scoopable batter consistency.
Use the spoon measurements I share in the recipe as your guide and try to keep the amounts of starter, flour, and water roughly equal.
A scale is more accurate and gives you more consistent results long term, but if you do not have one yet, this spoon method will still work.
To scale up your starter, you keep the same feeding ratio but feed a larger total amount so you end up with exactly what you need for baking.
For example, if you like using a 1:2:2 ratio and you want 200 grams of starter, you'd just do the math so that 1 part is 40 grams (40 grams of starter, 80 grams of flour, 80 grams of water = 200 grams of total starter made).
The easiest way is to plug your numbers into my sourdough starter calculators, which tell you exactly how much starter, flour, and water to mix for any amount you want.
Sourdough Starter Troubleshooting Guide
Starters are magical-but they can also be confusing, especially when you're just getting started. That's why I created this sourdough starter troubleshooting guide: to help you recognize common problems, fix them fast, and feel more confident caring for your starter every day.
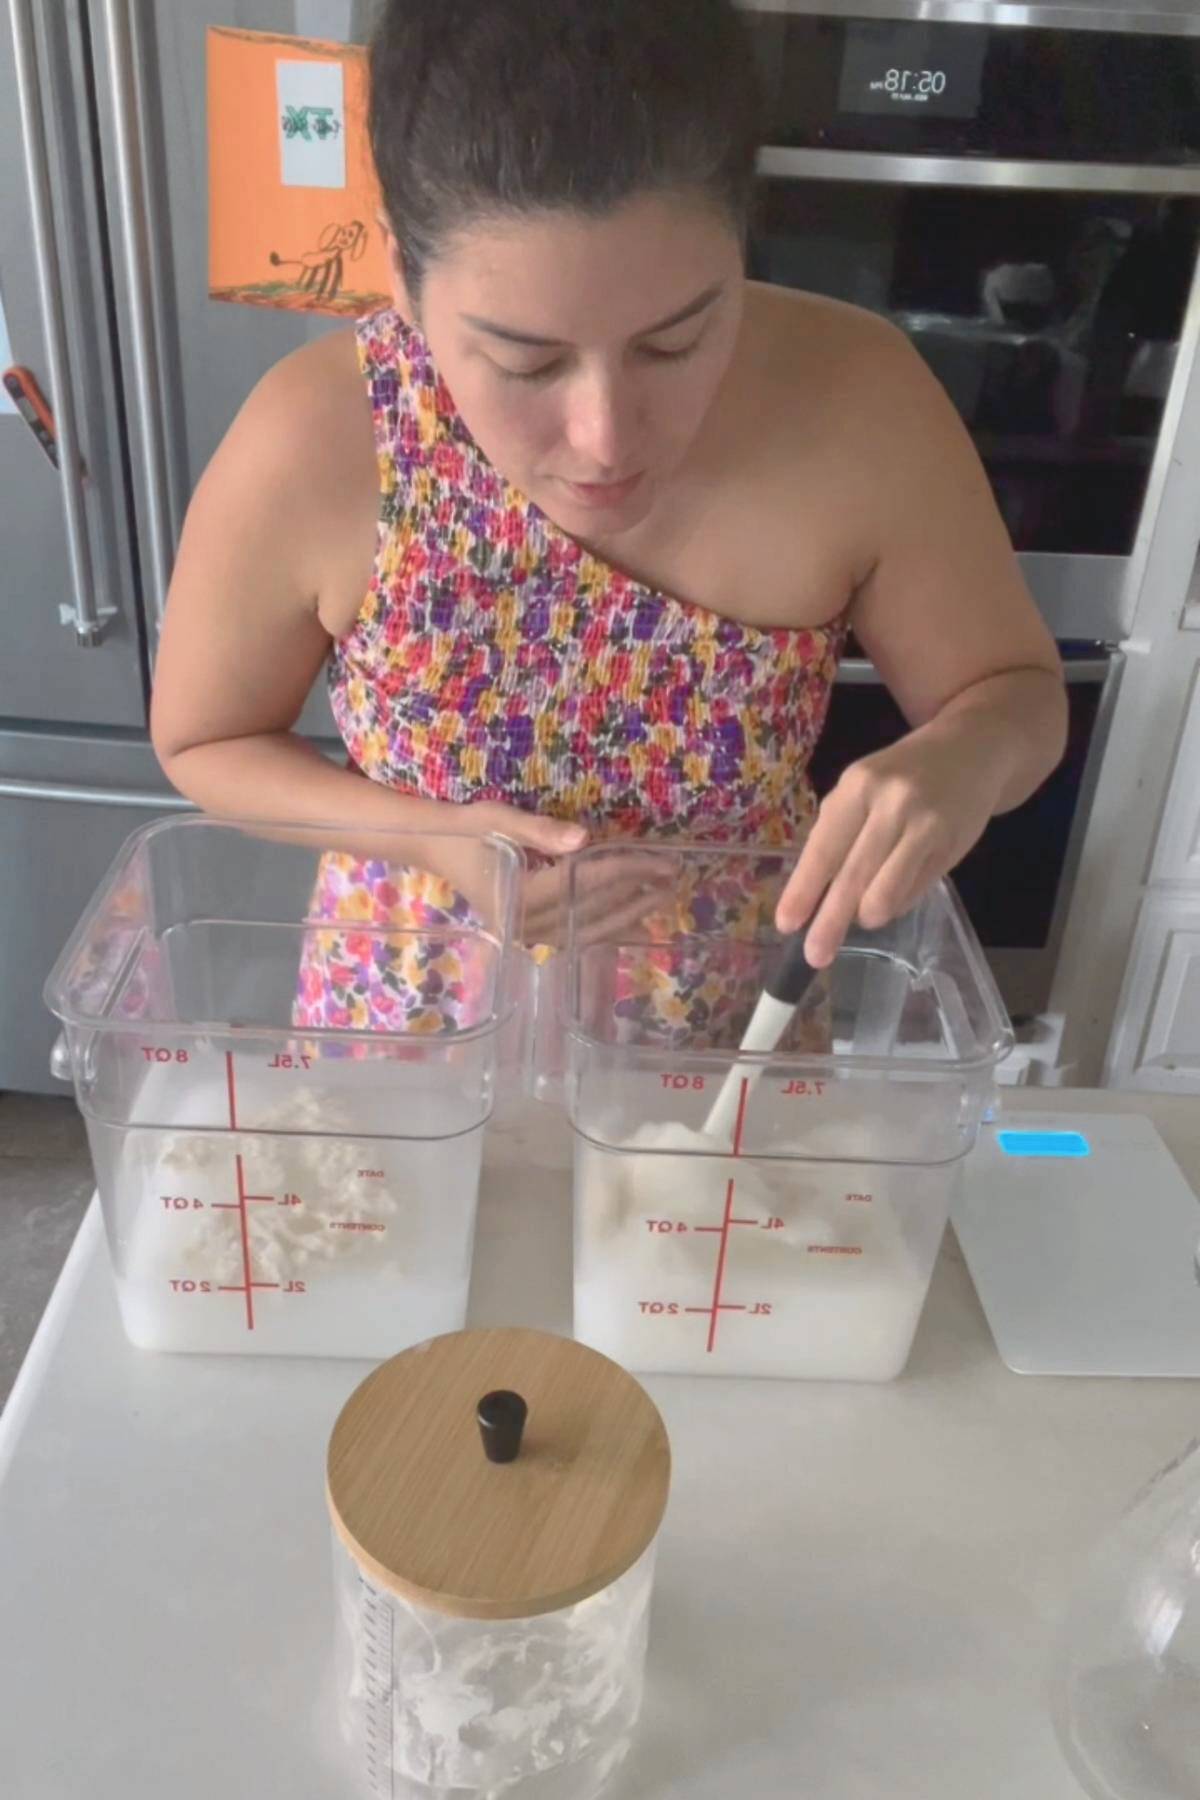
How To Make Sourdough Starter In Bulk
If you are paid subscriber of my Substack, Bringing Bread Back, checkout all the premium content I shared with you there, including:
-Details on where I source the ingredients from
-My workflow to make sourdough starter in bulk to bake with or for workshops.
-Recommended equipment and tools with discount codes
Want to Save This Page?
How To Make a Sourdough Starter From Scratch
Ingredients
- 370 grams (approx. 3¼ cups) bread or all-purpose
- 370 ml (approx. 1½ cups + 1 tablespoon) filtered water lukewarm
Instructions
DAY 1
- In a clean jar, mix well 10 grams of flour (about 1 tablespoon) with 10 grams filtered lukewarm water (about 2 teaspoons). Cover loosely and keep at 85°F / 29-30°C.
DAY 2
- Morning Feed:Discard 10 grams of starter into your discard jar. In your starter jar, mix well 10 grams of flour (about 1 tablespoon) with 10 grams of filtered lukewarm water (about 2 teaspoons). Cover loosely and keep at 85°F / 29–30°C.
- Evening Feed:Discard 20 grams of starter, leaving 10 grams in the jar. Mix well 10 grams of flour (about 1 tablespoon) with 10 grams of filtered lukewarm water (about 2 teaspoons). Cover loosely and keep at 85°F / 29-30°C.
DAY 3
- Morning Feed:Discard 20 grams of starter, leaving 10 grams in the jar. Mix well 10 grams of flour (about 1 tablespoon) with 10 grams of filtered lukewarm water (about 2 teaspoons). Cover loosely and keep at 80°F / 26–27°C.
- Evening Feed:Repeat the same steps: discard 20 grams, leave 10 grams, and mix in 10 grams of flour (about 1 tablespoon) with 10 grams of filtered lukewarm water (about 2 teaspoons). Cover loosely and keep at 80°F / 26-27°C.
DAYS 4-9
- Increase to 1:2:2 Feeding RatioMorning Feed:Discard 25 grams of starter, leaving 5 grams in the jar. Mix well 10 grams of flour (about 1 tablespoon) with 10 grams of filtered lukewarm water (about 2 teaspoons). Cover loosely and keep at 75°F / 23–24°C.
- Evening Feed:Discard 20 grams of starter, leaving 5 grams in the jar. Mix well 10 grams of flour (about 1 tablespoon) with 10 grams of filtered lukewarm water (about 2 teaspoons). Cover loosely and keep at 75°F / 23-24°C.
DAYS 10-14
- Increase to 1:4:4 Feeding RatioMorning Feed:Discard 20 grams of starter, leaving 5 grams in the jar. Mix well 20 grams of flour (about 2 tablespoons) with 20 grams of filtered lukewarm water (about 4 teaspoons). Cover loosely and keep at 70–75°F / 21–24°C.
- Evening Feed:Discard 40 grams of starter, leaving 5 grams in the jar. Mix well 20 grams of flour (about 2 tablespoons) with 20 grams of filtered lukewarm water (about 4 teaspoons). Cover loosely and keep at 70-75°F / 21-24°C.
Use at Peak
- You can use it to bake bread once it has peaked after a feeding. Depending on the feeding ratio and the environment temperature and humidity, it will take 4-14 hours (4-6 hours for a 1:1:1 feeding and 10-14 hours for a 1:10:10 feeding). The top won't be domed (which would indicate is still rising) and it might actually have started to drag back down slightly.
Storage
- You can store your sourdough starter two ways. Choose the method that fits your baking rhythm-and switch anytime!At room temperature if you’re baking often (daily or every other day). This keeps it active and ready to go, but it will need regular feedings—usually twice per day.In the fridge if your sourdough starter is well established and you need a break or only bake once a week. The cold slows down fermentation, so you’ll only need to feed it about once a week. Just let it come to room temp and feed it a couple of times before baking with it again.
Related Recipes
Looking for other sourdough recipes? Try these:


Subscribe to get my recipes
Join the movement Bringing Bread Back to every family table! Get recipes for homemade bread and other bakes delivered via email.
Leave a Reply