
A sourdough starter is one of the most magical things you can keep in your kitchen. Just flour, water, and a little care turn into a living culture. This culture gives bread its rise, flavor, and character. But as special as starters are, they can also bring up a lot of questions. This is especially true for new bakers. This sourdough starter troubleshooting guide should help!
Every time I share about my starter, I get messages asking for help troubleshooting. That's why I've put together this sourdough starter troubleshooting guide. It will help you identify and solve the most common sourdough starter issues. This will help you feel confident and keep your starter thriving.
My answers come from two places:
- my own hands-on experience and research reading from incredible bakers like Hendrik Kleinwächter, Addie Roberts, Trevor Jay Wilson, Tom Cucuzza and others.
- everything I've absorbed from my mom-a biology teacher passionate about living organisms and their extraordinary inner workings. Who, for as long as I can remember (and still to this day!) never stopped talking about them. This was especially true when we baked together. Gracias mamá!
Learn How To Make Your Own Sourdough Starter From Scratch!
Before we dive into sourdough starter troubleshooting, here are a few truths you have to know:
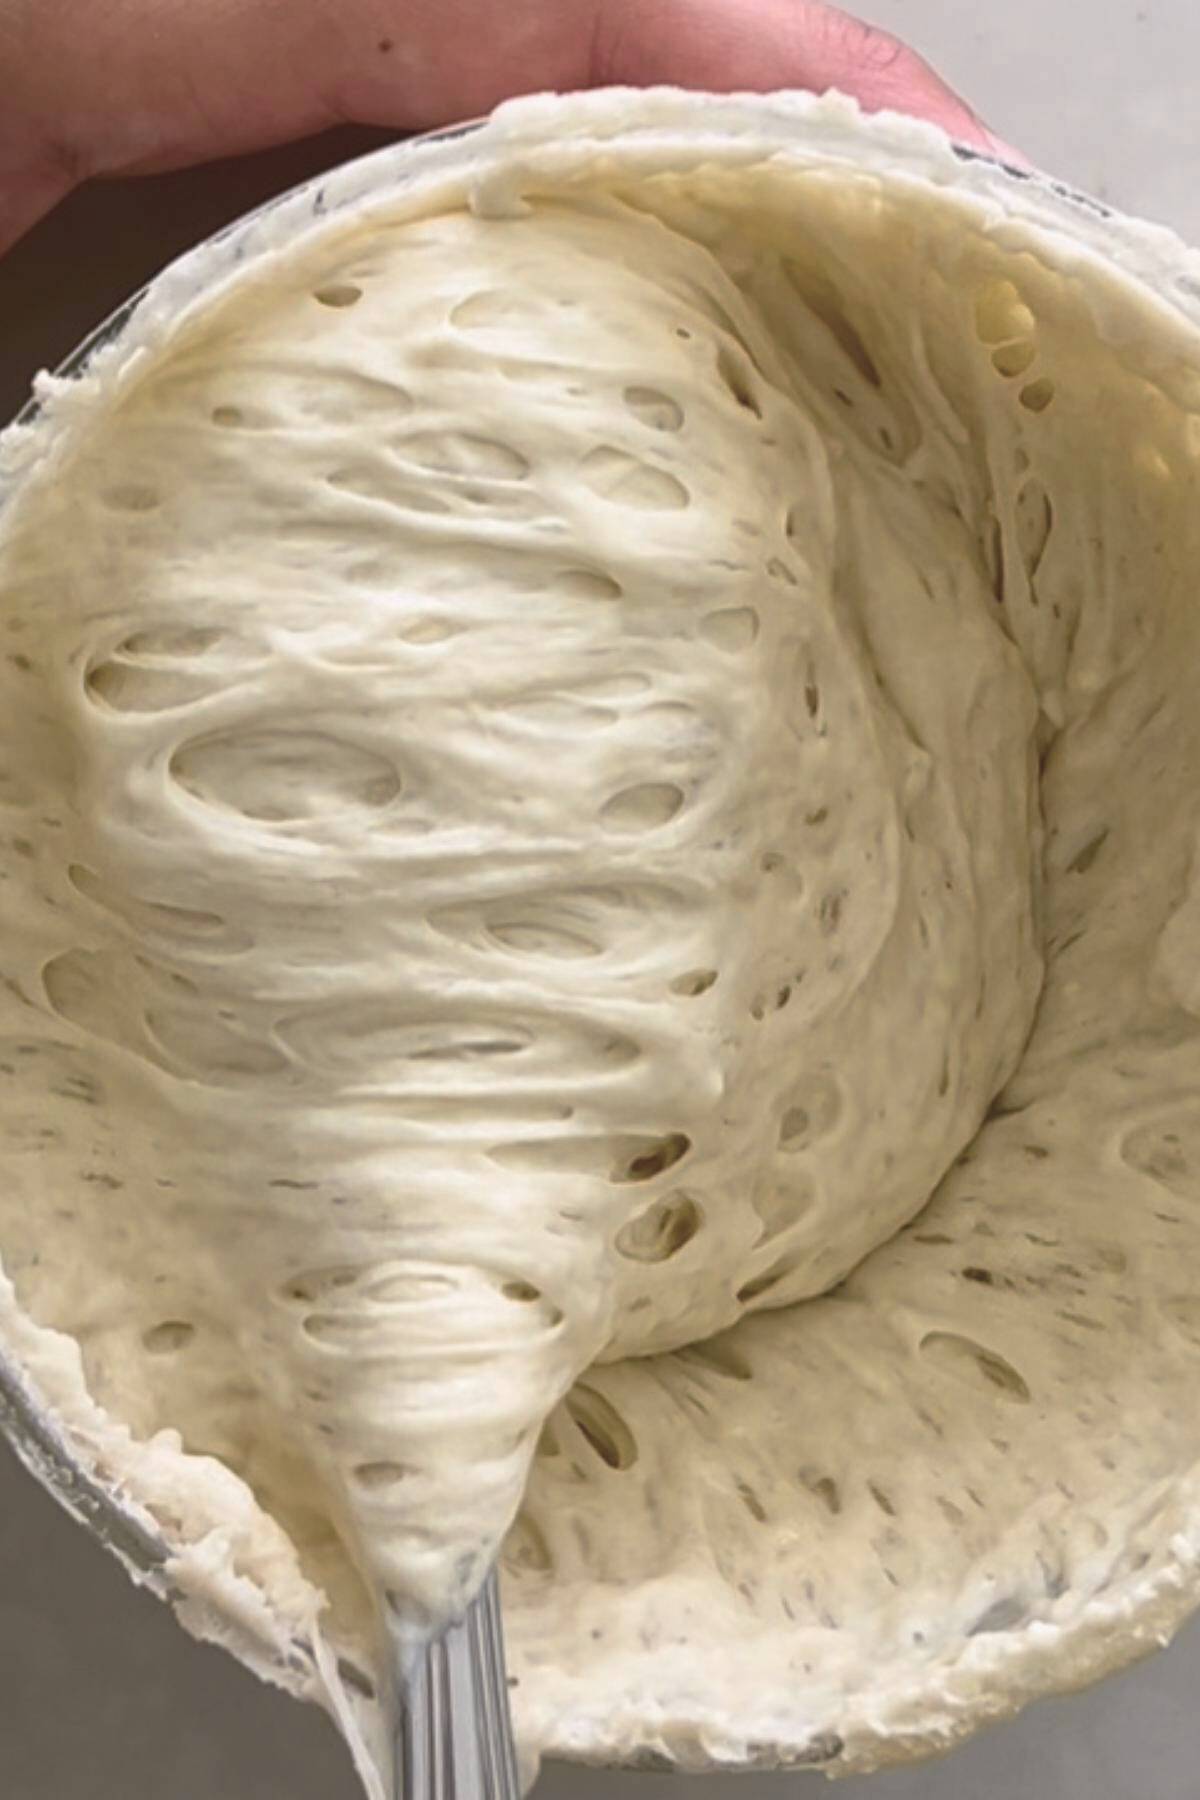
A sourdough starter is a living colony of wild yeast and lactic acid bacteria. These microbes are already in your flour, in the air, on your tools-so yes, they will show up. Your job is to give them the right conditions to thrive.
Like any living thing, your starter has needs:
It needs to eat regularly, breathe a little, stay cozy, and live in a clean environment. Sound familiar?
Here's how to set it up for success:
- Don't let it go hungry-when it runs out of food, it gets sluggish (I would get hangry too, buddy!).
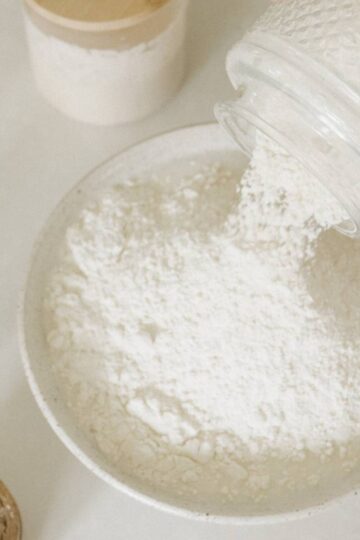
- Feed it quality flour and lukewarm filtered water-nutritious, enzymatic-action packed meals. Pair these with not fridge-cold, and definitely not hot-to-the-touch water.
- Stir it well at feeding time and again mid-day to add oxygen (helps yeast grow!).
- Keep it warm-around 75-85°F is the sweet spot for early growth.
- Never refrigerate a young starter-wait at least 2 weeks of room-temp feeding first.
- Keep it out of direct sunlight-UV rays are not your starter's friend.
- Stay clean-clean spatula, clean jar top, loose lid, fresh jar now and then.
Every time someone tells me their starter isn't working, it always traces back to one of these basics. If you treat it like the living thing it is-not like a project, but like a little pet-it'll thrive.
That said: once your starter is strong and established, it becomes super resilient. Used cold water once? It's fine. Fed it a little late? Fine. Forgot it peaked? Still fine. Left it in the fridge too long? You can bring it back. Just don't make it a habit. When you mess up (we all do), show it some extra love for a few days. It'll bounce right back. Promise.
Get Some Of My Very Own Sourdough Starter
Sourdough Starter Troubleshooting
A starter that isn't rising well or reaching full maturity may be due to weak yeast activity or the balance between yeast and lactic acid bacteria (LAB) being off. Yeast relies on readily available sugars, broken down by enzymes like amylase from the flour. If the flour quality is poor or the environment is too cold, yeast metabolism slows down.
If you are not seeing bubbles after a few days, if the starter is not rising, it could mean a couple of things:
- The colony of microorganisms is still small to consume the given amount of flour/water, metabolize it and produce CO2 gas as a result.
- The temperature might not be ideal. You might have used cold water or you might be keeping it at room temperature the first few days when higher temperature was recommended.
→ My suggestions to solve this issue are:
Do not feed it again for 24-36 hours after last feeding and keep it warm, around 85F until you see some activity. In the warmer environment, whatever small colony of microorganisms you currently have will reproduce faster (more of them) and breakdown the available starch and proteins in the flour into sugars and amino acids they can use and metabolize faster, producing CO2, which you will be able to observe as bubbles, indicating activity.
Wait until the activity slows down and you see very few to no bubbles again, and then feed.
Ensure you're using high-quality, strong flour with active enzymes that promote yeast growth. Consider introducing some whole wheat or rye flour to increase the enzymes.
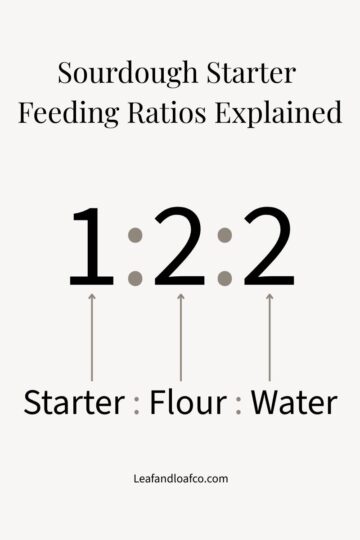
If it's sluggish, consider refreshing it with a higher feeding ratio (e.g., 1:4:4 or higher) to give it a nutrient boost.
If your starter has a strange smell (like sweet, cabbage-like or funky) instead of the pleasant tangy smell of a sourdough starter, is runny and foamy, and it goes completely flat if stirred, you might have an overgrowth of the Leuconostoc bacteria, commonly present in the early days of a new starter. It produces gas (CO2) and causes bubbling and rising, even though the colony of wild yeast, the one typically responsible for the development of CO2 gases during fermentation, is fairly small.
The bacteria is harmless and will eventually die off as the starter becomes more acidic by gathering more lactic acid bacteria (LAB) from the environment.
→ Continue to feed your starter as suggested and keep it warm and the starter could overcome this in as little as one day.
If your starter smells strongly like raw flour, it may not be fermenting properly. This can happen if the starter is underfed or dormant, or if it's too young and the microbial community hasn't fully developed yet.
→ Increase feedings to every 12 hours (only after it has visibly peaked and started to fall) and keep the starter in a warm environment of around 80°F (26.°C). Using whole grain flour can also help by increasing microbial activity and providing more nutrients.
A watery or overly bubbly starter may be a sign of too much hydration or imbalanced fermentation. A runny consistency can also indicate that the yeast has consumed most of the available sugars, and the starter is "hungry." It might be peaking and dragging faster than you think. This can be due to a change in the ambient temperature, using a flour with more enzymes that breakdown sugars faster, making them available for the microbes to easily consume.
→ Watch for it to peak and feed it more often, at a higher ratio to ensure it has enough food to get it to the next feeding. adjust the hydration ratio to make a thicker starter (e.g., 1:1:0.75, flour to water). This slows down fermentation and helps maintain a more stable structure. Be sure to feed it regularly to keep the yeast well- nourished and consider trying different flour types and controlling the ambient temperature.
Hooch is the liquid that forms on the surface of a sourdough starter when it hasn't been fed for a while. This liquid is a byproduct of fermentation and consists primarily of ethanol (alcohol) along with water and other fermentation byproducts which separate from the starter and collect on top.
Sourdough hooch can vary in appearance but is usually a grayish, brown, or sometimes even yellowish layer of liquid, sitting just above the starter.
Hooch is a clear indicator that the starter is starving, and the yeast is entering a survival mode. While it is harmless, its presence signals an imbalance in the microbial environment, primarily due to the lack of fresh nutrients. At this point, it's more of a discard jar than a starter, but it can be brought back to health with several regular feedings.
Sourdough hooch can technically be stirred back into your starter, but I don't recommend it. When you stir hooch in, you're putting water, alcohol, and other byproducts back into the mix. That slightly dilutes the nutrients and shifts the balance away from a fresh, strong flour-based feed, weakening your dough, and slowing down recovery. Instead, pour it off before feeding to help keep your starter balanced and healthy.
→ Regular feedings ensure that your yeast and LAB remain well-nourished, reducing hooch production and maintaining the right acidity for healthy fermentation.
Sourdough starters are usually resilient thanks to the acidic environment created by lactic acid bacteria (LAB). But when you neglect feedings, the yeast and LAB weaken due to lack of nutrients. That opens the door for unwanted bacteria and they can cause foul odors like rotten or spoiled smells.
A healthy starter should smell tangy and pleasant; if it smells off, it's a red flag that bacterial contamination may be taking hold.
→ Feed consistently, keep the starter well-fed, and always use clean tools to help the good microbes stay in charge.
Mold grows when a starter is neglected-especially on the surface where moisture and air meet. Visible mold often appears as fuzzy green, black, pink, or orange patches.
- Green and black mold are common in spoiled food.
- Pink or orange can signal more dangerous bacterial contamination like Serratia marcescens.
If you see any of these, the starter is no longer safe and must be discarded. Don't confuse mold with hooch, the harmless liquid that sometimes forms on top. Mold is fuzzy or discolored and can't be fixed with feedings.
→ Keep the jar clean, wipe down the sides, and consider using a fresh jar every few feedings-especially during the first couple of weeks.
A previously active starter that becomes dormant may have been exposed to an overly cold environment or gone too long between feedings, causing yeast and LAB activity to drop.
→ Dormant starters can often be revived by giving them frequent feedings (every 12 hours) and keeping them at slightly warmer temperature (around 75-80°F). Add whole grain flour to increase enzyme and nutrient availability, which helps stimulate yeast activity. The starter should show signs of bubbling and rising after a few feedings.
If you miss a feeding but no hooch or mold has formed, your starter should still be fine. The yeast and LAB will enter a slower metabolic state but remain viable.
→ Simply resume feeding as usual. The starter may take a bit longer to respond, but the microbial population should bounce back quickly.
Missing several feedings, especially over a few days, will cause the yeast and LAB to slow down significantly. The starter will become more acidic, and the yeast will produce less CO2.
→ If no hooch or mold has formed, discard and refresh with a 1:4:4 ratio or higher to dilute the built-up acidity and reintroduce food. Feed it every 12 hours until it regains its usual vigor.
If you will be away for more than a week, leaving your starter unfed could cause it to go dormant, form hooch, or even spoil.
→ For longer breaks (like for trips, work, life events, etc), refrigerate your starter to slow down microbial activity. Before storing, feed it at a high ratio of 1:10:10 to ensure it has enough nutrients to last. When you return, discard and resume normal feeding to wake it up. If you'll be away for several weeks, consider drying some of the starter as a backup or asking someone to refresh your starter.
You can travel with your sourdough starter either as a small liquid sample or in dehydrated form.
Option 1: Liquid Starter (Carry-On Friendly)
- Limit to 3 oz (90 ml) in a well-sealed, leak-proof container.
- Label clearly: "Live Sourdough Starter - Not Hazardous."
- Leave room for gas expansion.
- Keep in your carry-on to avoid pressure-related leaks in checked bags.
Option 2: Dehydrated Starter
- Spread starter thinly on parchment and let it dry completely.
- Break into flakes and store in an airtight bag or container.
- Keep in your checked bag or in your carry-on.
If the starter looks healthy and at peak, but the bread it makes is flat or dense, the issue more often than not may lie in the process of making bread rather than on the starter itself. You could be under proofing the dough before shaping, degassing during shaping, or over proofing before baking.
But it's possible there could be an issue in the balance between yeast and LAB. An overly acidic starter can weaken the gluten, making the dough unable to trap gas effectively.
→ First, ensure your starter is actually mature (14 days+ of consistent rising), doubling or tripling in size before using it in the dough. Make sure you use it at peak only, when the yeast is most active. If the starter is overly acidic (indicated by strong sour smell, weak dough that won't withstand stretch and folds or coil folds or pass the window pane test, go flat after shaping, and result dense after baking), discard most of it and refresh only a small portion with a higher ratio of flour to water (e.g., 1:5:5 or higher) to dilute the acidity. Feed it every 12 hours until it regains its usual vigor.
I also like to recommend stirring your starter once or twice before it peaks to introduce oxygen, which will help the yeast in your starter reproduce. Yeast are facultative anaerobes, meaning they can survive without oxygen but multiply much faster when it is present. Oxygen allows the yeast to utilize a more powerful metabolic pathway for reproduction, rather than just fermentation, leading to a more robust, active starter.
Additionally, be mindful of proofing times to give the dough enough time to rise at least 50% before shaping, be delicate during shaping as to not degassing the dough, and be careful to bake the dough before it becomes over proofed.
In colder temperatures, the activity of yeast and LAB slows down significantly, which can lead to sluggish fermentation and poor starter performance.
→ Keep your starter in a warmer spot (at least 70°F). If your home is too cool, consider placing the starter in the oven with just the light on or using a proofing box. You can also insulate the starter jar by wrapping it in a towel or using a warming pad. Give it more time to reach peak before using it.
A nail polish remover or acetone smell indicates an imbalance in the microbial environment, typically caused by an overgrowth of acetic acid bacteria (which produce stronger acids). Fluctuating or overly warm conditions can stress the microbes and cause this sharp-smelling shift.
→ Discard part of the starter and feed it with fresh flour and water at a higher ratio (e.g., 1:4:4 or higher). Keep it at a stable, slightly cooler room temperature-around 70-75°F-to support heterofermentative lactic acid bacteria, which help restore balance and mellow the acidity over time.
If the crust is thin and hasn't molded, you can remove it, discard it, and feed the starter as usual. To prevent this in the future, ensure the starter is covered loosely with a breathable lid (like a cloth or loose jar lid) to retain moisture while still allowing airflow.
Additionally, controlling humidity by keeping the starter in a more humid environment or using a damp cloth can help maintain the proper hydration level and prevent the surface from drying out.
In some cases, a starter might separate, with liquid forming at the bottom or top of the jar. This is often a sign of over hydration or too long between feedings.
→ Adjust the hydration level of your starter by adding more flour or reducing water in future feedings.
If your starter rises and falls too rapidly after feeding, it may be due to an excess of simple sugars in the type of flour you chose, overly warm conditions, or too much yeast activity.
→ Try lowering the ambient temperature and feeding your starter a higher ratio of flour to water (e.g., 1:4:4 or higher) to slow down fermentation. You can also try a different type of flour with less enzymes, like all purpose flour.
Discard from a starter made from scratch is usually not recommended for the first 5 to 7 days. That is because, in the beginning, different unwanted microbes can be present before the good yeast and bacteria fully take over. These microbes can come from the flour itself, the water, the jar, utensils, and the surrounding environment. This early stage is a normal part of the process, but it is not the best time to save discard for recipes.
Discard from a mature starter is perfectly safe to use, as long as the starter has been cared for properly and has no signs of spoilage like mold or unusual pink or orange streaks.
Discard from a reactivated starter that came from a strong, mature mother starter, like Leaf and Loaf's, is also safe to use during reactivation. Since the culture already began as an established, healthy starter, it is very different from starting one from scratch.
I love this question and I left it for the end because I want to respond at length.
I have a strong opinion on this. People think having an acidic starter is bad, but ALL healthy sourdough starters are acidic, and that is a good thing. Let me explain.
Technically, anything below pH 7 is acidic, as many of us learned back in middle school science. In my Food Safety Certification course, I learned that many unwanted bacteria do not grow well below a pH of 4.6, which is why we want a healthy starter to drop below that threshold, and be, well, pretty acidic.
Acidic starter = not unwanted bacteria = good
Thankfully, sourdough starters contain lactic acid bacteria that not only create that safe acidic environment, but also work in harmony with sourdough yeasts that can tolerate those acidic conditions.
One of my favorite sourdough tools is a pH meter. I use and love the one by Apera Instruments, but Hanna Instruments makes a great one, too. You can also find them pretty cheap on Amazon, without the bluetooth option.
Right after a feeding, your starter's pH is higher (around pH 6) because the fresh flour and water dilute the acids already present. The exact starting pH depends in part on your flour, your water, and how acidic the seed starter was.
As the starter ferments, the yeasts and lactic acid bacteria feed on sugars in the flour. The lactic acid bacteria produce organic acids, which cause the pH to drop, while the yeasts produce carbon dioxide that helps the starter rise.
By peak, a healthy mature starter is often around pH 3.8 to 4.0. This is when the starter reaches its highest point and is just beginning to deflate, as the acidity starts weakening the gluten network that holds the gas,
Those numbers reflect strong acidification by the beneficial microbes in the culture, which helps sourdough stay stable and selective for the organisms we want. Remember: Acidic starter = not unwanted bacteria = good
After peak, the pH keeps trending lower as acids continue to accumulate. That is the stage people often call "overly acidic." Usually, what they really mean is that the starter has gone too far past peak and has spent too long sitting in a highly acid state.
The good news is that feeding resets that! When you feed a starter, you dilute the accumulated acids and raise the pH again. Then, as fermentation continues, the pH gradually drops again. So a well loved "acidic starter" does not stay in that overly acidic state for long.
The size of your seed matters too. A bigger seed (the amount of starter you keep in the jar before feeding again) carries more of the old starter into the new feeding, which means it also carries more acid into the mix. That causes the refreshed starter to begin at a lower pH and reach low pH faster.
If that concerns you, feed at higher ratios and feed peak to peak, meaning do not let the starter drift too far past about pH 3.5 before refreshing it again.
A healthy starter is supposed to be acidic. The better question is whether it is being fed often enough, at the right ratio, and used at the right point in its cycle.
Caring for a sourdough starter doesn't have to feel overwhelming-it's all about understanding what your starter is telling you. Knowing how to respond is key. This is where sourdough starter troubleshooting truly becomes essential.
Remember, every starter has its own personality. This is given by the flour you feed it, the conditions you keep it in, etc. Part of the joy is learning how to work with it.
With a little patience and these troubleshooting tips, you'll always be able to bring your starter back to health. You can keep it strong for many bakes to come.
Happy baking, my loaves!
~ Maria
Want to Save This Page?
Related Posts
Looking for other content like this? Try these posts:

subscribe to get sourdough tips
Join the movement Bringing Bread Back to every family table! Get sourdough tips and recipes for homemade bread and other bakes delivered via email.
Leave a Reply