
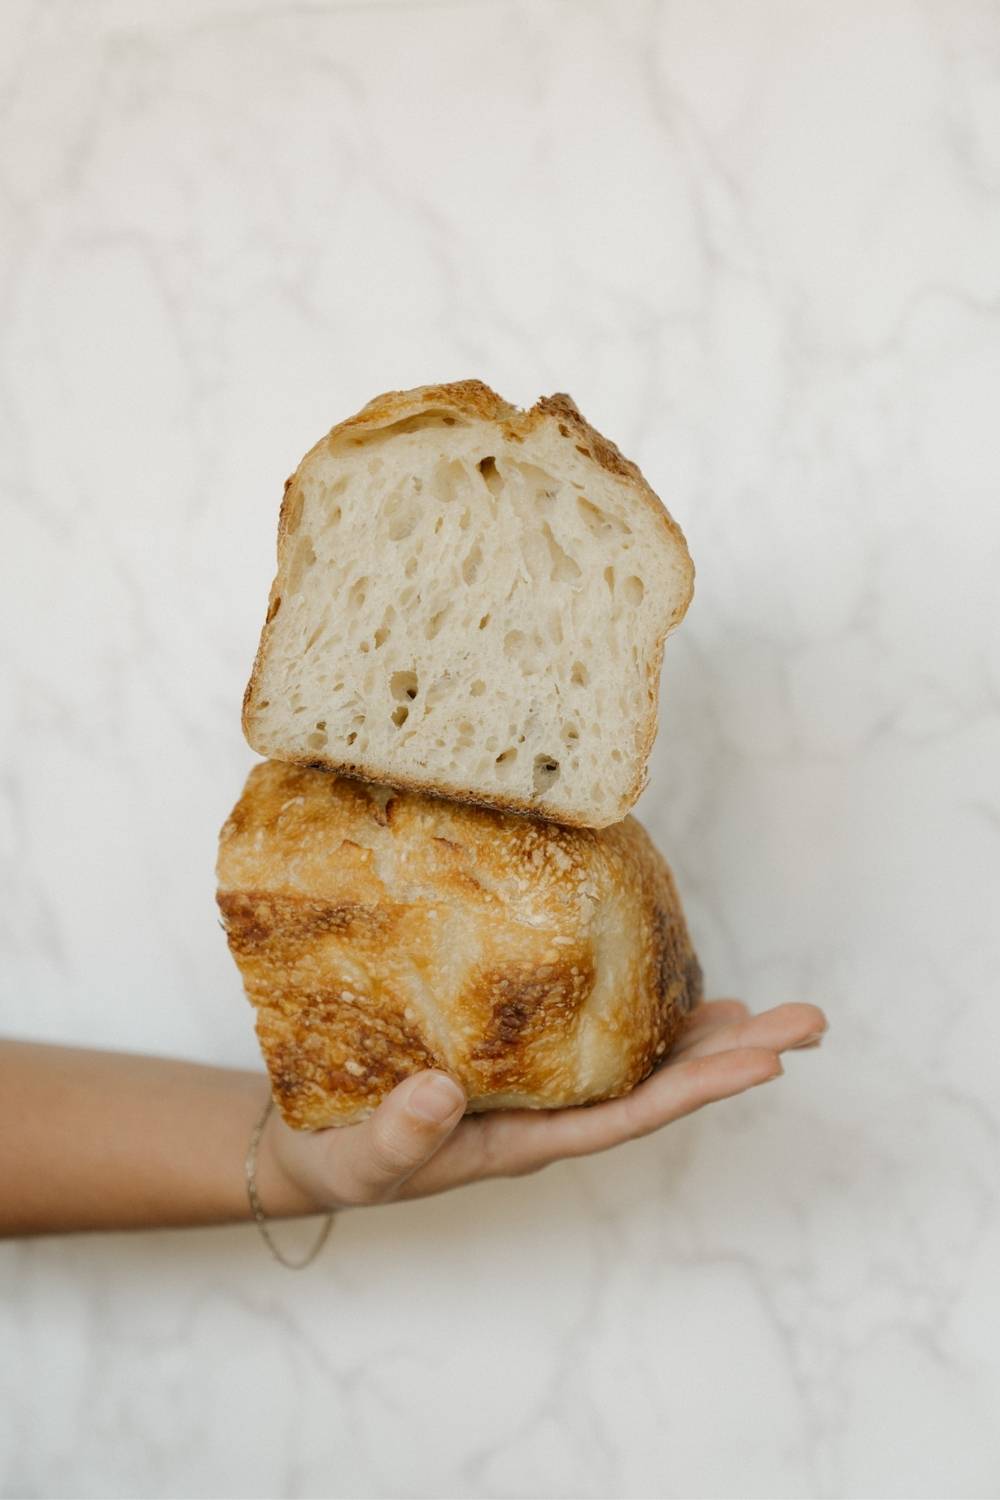
If you love classic artisan sourdough bread but want a loaf that's easier to store and slice, with slices that fit perfectly in any toaster, and that are easy to use for sandwiches or toast, then this is the recipe for you. It's baked using the viral Two Pan Method I developed to bake bread in bulk using home ovens (both electric or gas!).
The dough itself is still the same three-ingredients I use for the classic artisan sourdough bread recipe: flour, water, salt, plus your active sourdough starter.
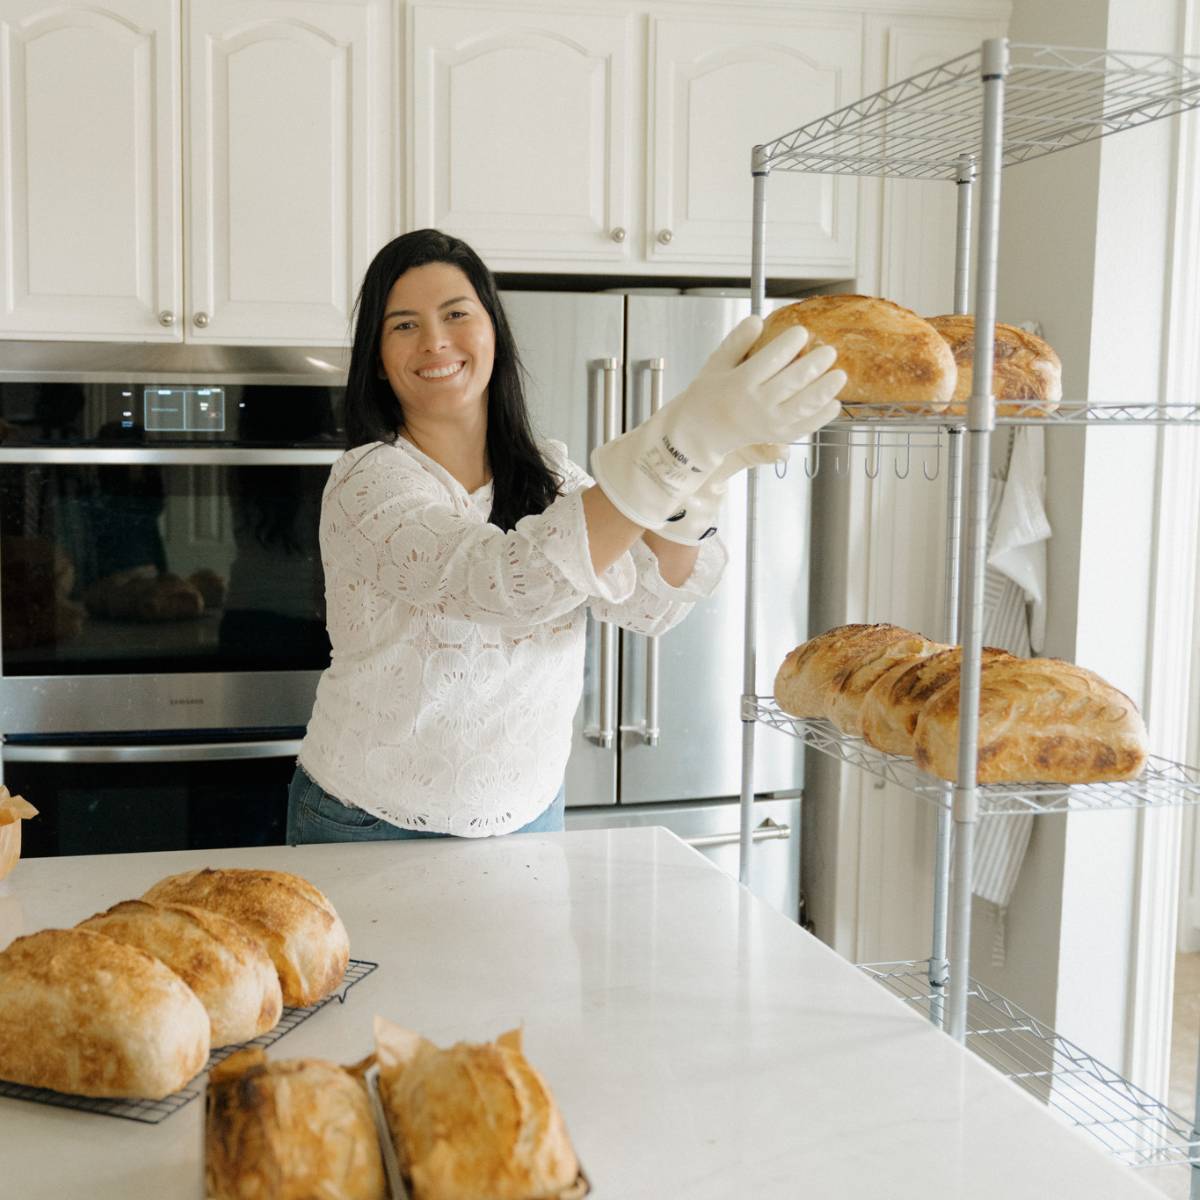
The "magic" here is how we bake it using using two loaf pans: one holds the dough, the other traps steam. No need for heavy Dutch ovens or dealing dangerously with boiling water.
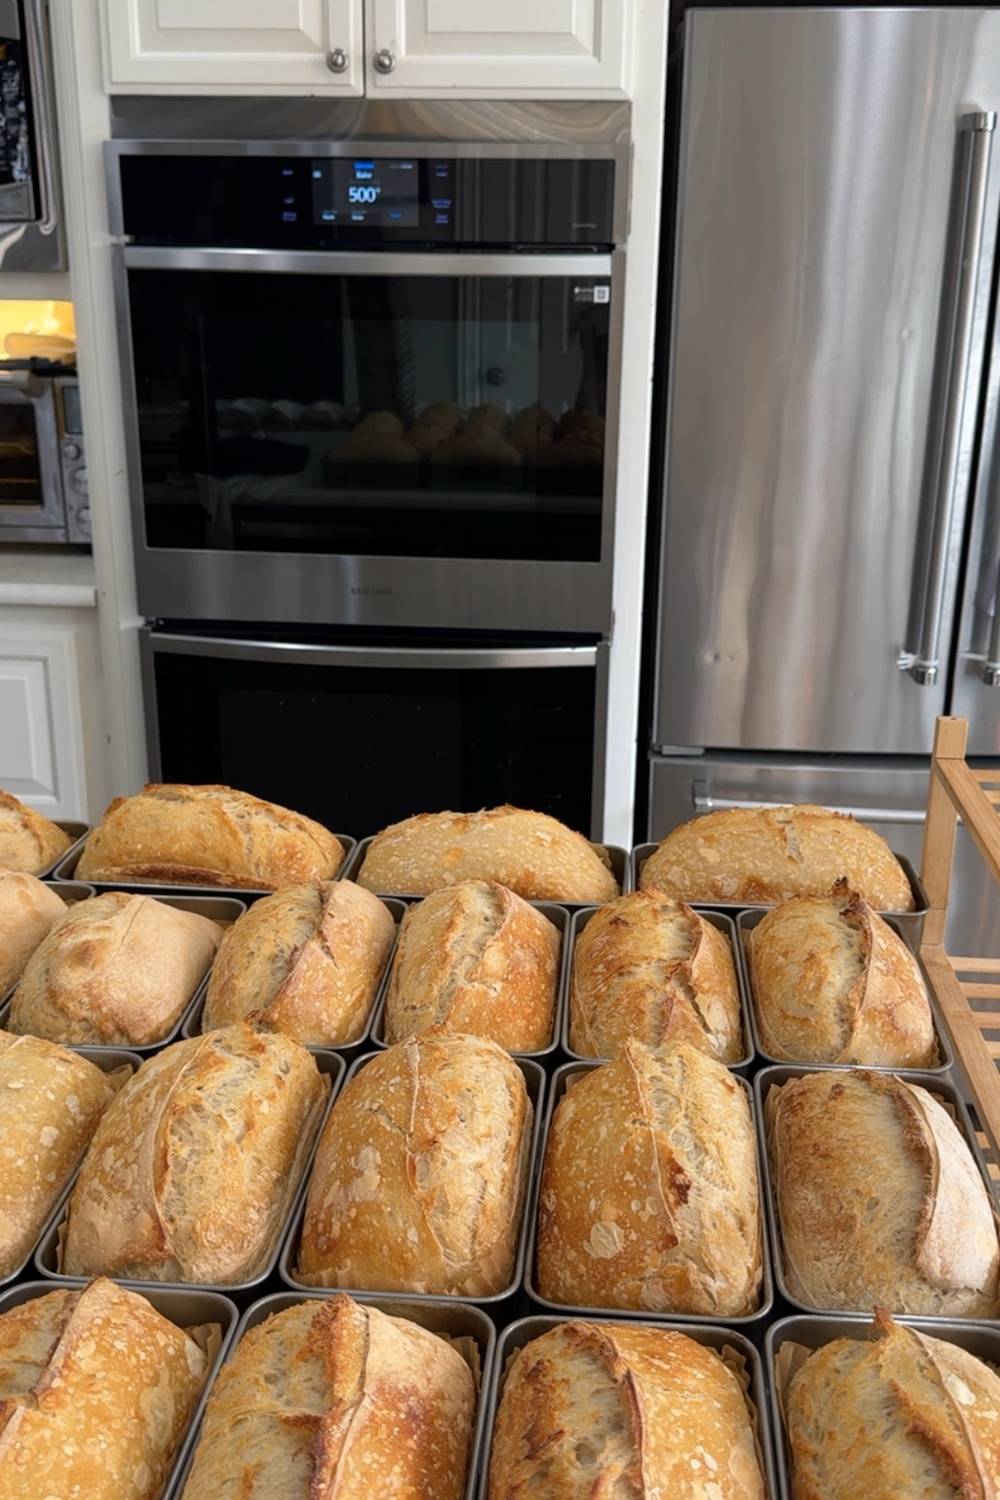
And because of how compact the loaf pans are, you can bake several at once in your home oven. I bake up to 12 in 45 minutes!
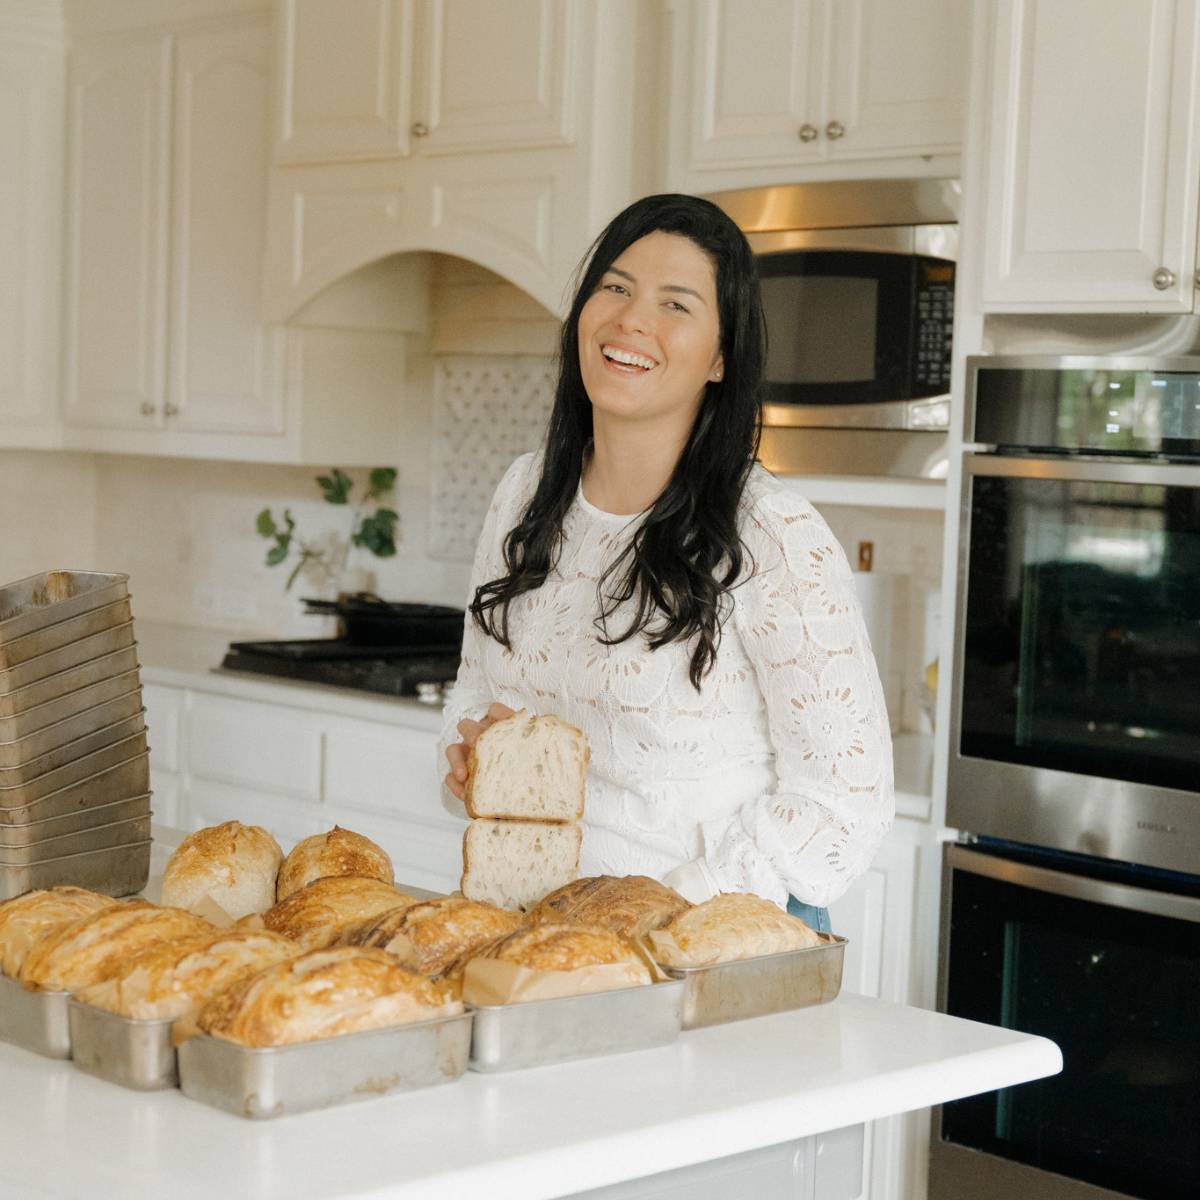
This is the very same recipe I use to bake bread for customers of my little home bakery.
Thousands of home bakers have downloaded my ebooks and used my recipe and methods to make sourdough bread at home and even for sale! I love reading your messages, please keep them coming!
If you love baking sourdough bread using loaf pans after making this recipe, you might want to try my other recipes using the Two Pan Method.
Jump to:
- Why Use The Two Pan Method?
- Ingredients For Sourdough Bread Using The Two Pan Method
- Equipment Needed To Make Sourdough Bread Using The Loaf Pan Method
- Key Steps To Make Sourdough Bread Using The Double Pan Method
- Tips For Success Making Sourdough Bread Using The Two Pan Method
- Storage For Sourdough Bread Made In Loaf Pans
- Substitutions
- Frequently Asked Questions About Classic Artisan Sourdough Bread Recipe
- Sourdough Bread In Loaf Pan
- Related Recipes
- subscribe to get my recipes
Why Use The Two Pan Method?
Here's why so many bakers stick with this method once they try it:
- It makes practical bread:
Easy to store in most bread boxes, and the slices fit in any type of toaster. This loaf is also easier to slice than a traditional boule, and the slices are perfect for sandwiches or toast.
- It makes sourdough feel doable
No need for expensive bannetons, or heavy Dutch ovens. No awkward transfers into a screaming-hot pot, or guessing if your steam setup is "enough".
- Grace for the beginner sourdough baker
Even a slightly over-proofed loaf bakes tall and beautiful in a loaf pan, giving you all the benefits and extra flavor from the extended fermentation.
- Micro-bakery friendly
You can bake multiple pans at once, which makes this method scalable for gifting, sharing, or selling.
Ingredients For Sourdough Bread Using The Two Pan Method
This loaf is beautifully simple. You're working with the same three building blocks of sourdough bread: flour, water, and salt. And of course, your sourdough starter, which is just flour and water that's been fermented and turned into a living leavening agent.
Sourdough starter
Your starter is what naturally rises the dough and gives sourdough that signature flavor.
For best results, use your starter when it's strong, bubbly, and at peak. If your starter is a little sluggish, you can still make a really good loaf, but you might notice less rise or a loaf that doesn't open up as dramatically.
If you're thinking, wait… what even is a starter, and how do I make one? I've got a full post that walks you through it step by step. Visit How to make a sourdough starter from scratch.
And if you'd rather skip straight to baking, you can always grab some of mine:
Flour
I recommend a high quality bread flour, ideally organic, because the higher protein content helps the dough build structure. That means better chew, better shape, and a prettier rise in the oven.
But if all you have is a really good all-purpose flour (also ideally organic), you can absolutely still make this recipe. Just expect the dough to feel a bit softer and the crumb to come out slightly different.
Filtered water
I like using filtered water for sourdough so chlorine and other additives in tap water don't mess with the wild yeast and good bacteria living in your starter.
Also, use warm water, not hot. It helps keep the dough in a cozy temperature range while it ferments.
Sea salt
Fine sea salt with no additives is my go-to. It dissolves easily, seasons the dough evenly, and keeps the ingredient list clean and simple.
See the recipe card for exact quantities.
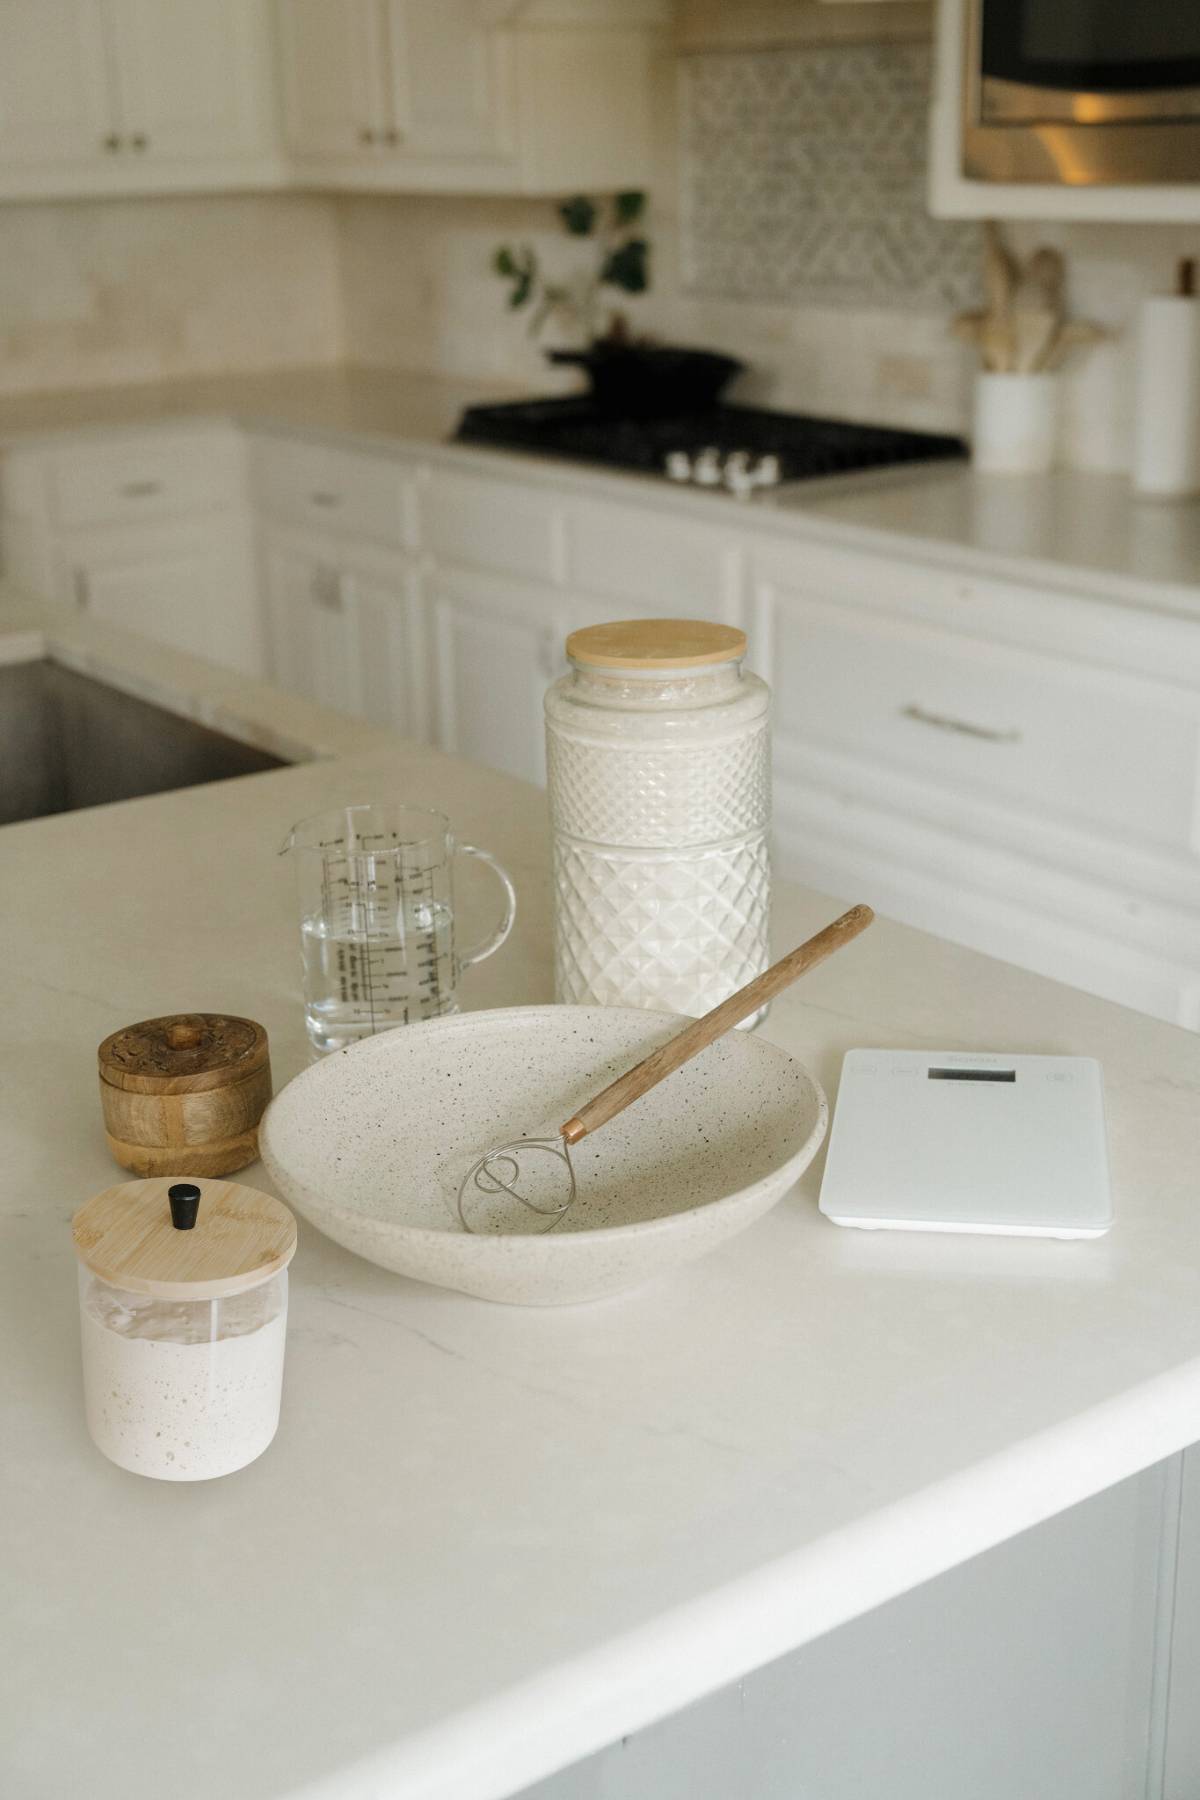
Equipment Needed To Make Sourdough Bread Using The Loaf Pan Method
You do not need a shrine of gadgets. You need a few basics, and a couple "nice-to-haves."
Must-haves
- large mixing bowl
- something to cover the bowl (damp towel, bowl cover, shower cap)
- kitchen scale (highly recommended for repeatable results)
- two identical loaf pans (same size and shape)
- lame or fresh razor for scoring
- cooling rack
Nice-to-haves (but genuinely useful)
- a bread mixer (a must-have if making several loaves at once)
- bench scraper (makes shaping cleaner and less sticky)
- banneton or a bowl lined with a towel (if you prefer proofing outside the pan first)
- parchment liners (makes removal and cleaning the pans easier)
Loaf pan note
If your loaf pans are different brands but truly the same dimensions, it can still work. The goal is a snug "lid" that traps steam. If the top pan is loose and wobbly, steam escapes and you lose the main benefit.
Key Steps To Make Sourdough Bread Using The Double Pan Method
One of my favorite things about sourdough is how flexible it is. Everyone has their own method, their own rhythm, and their own reasons for doing things a certain way, and honestly, that's part of the fun.
That said, when you zoom out and simplify it, most sourdough loaves follow the same basic path. Here are the 9 key steps in a classic sourdough bread recipe:
- Feeding your starter
- Mixing
- Folding
- First rise
- Shaping
- Second rise
- Scoring
- Baking (in this case, using the Two Pan Method)
- Cooling
Feed your starter (night before)
About 8-10 hours before you want to mix, feed a small portion at a 1:6:6 ratio so it peaks when you're ready. In a ~72°F (22°C) kitchen, that timing is usually perfect.
If your kitchen is warmer, it will peak faster. If it's colder, it'll take longer.
Mix the dough
Hold back a tiny splash of water (about 10 milliliters) for later.
Whisk the starter into the rest of the water, add flour and mix until no dry bits remain.
Continue mixing for about 6 minutes total. By the end, the dough should look smoother but still feel tacky.
Rest
Cover the bowl and let the dough rest 1 hour in a warm spot around 78°F (26°C).
This rest makes the dough easier to handle and sets you up for better gluten development during folds.
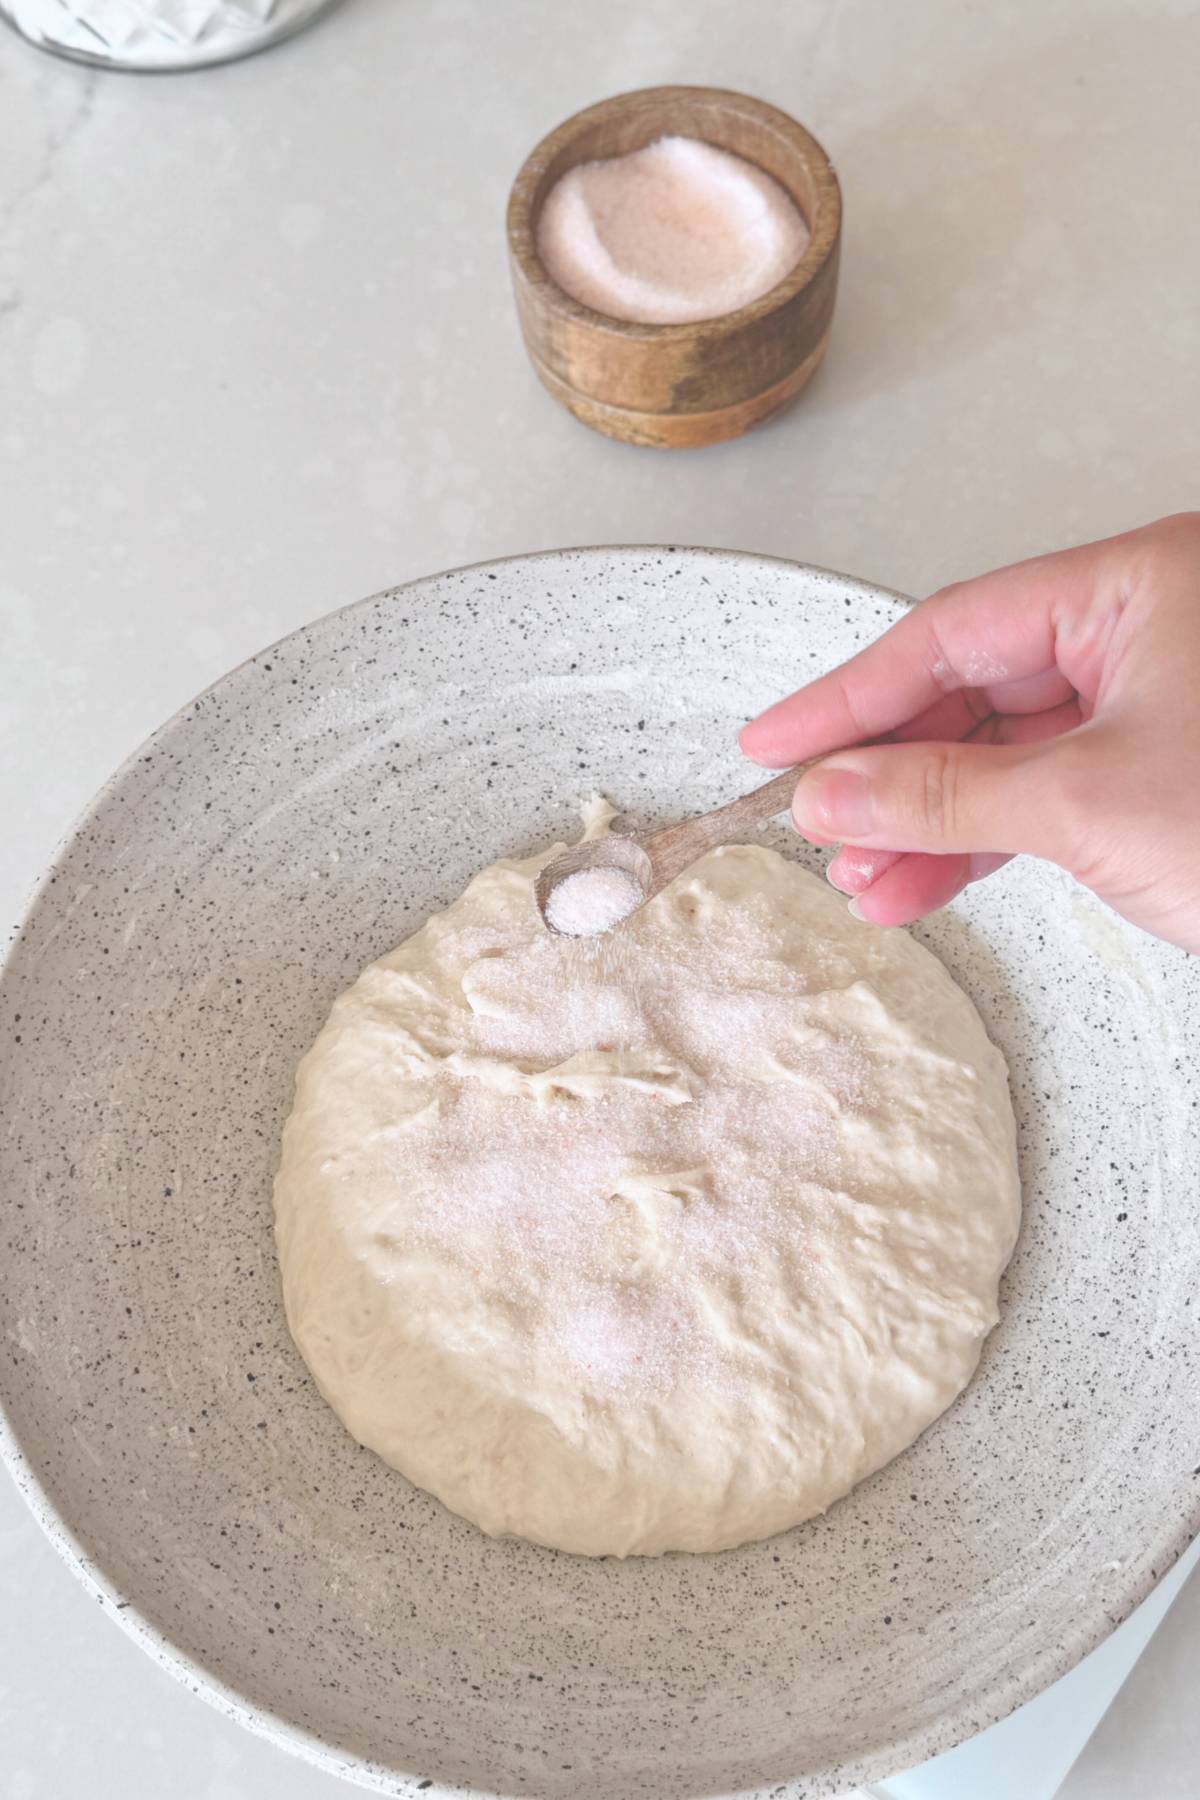
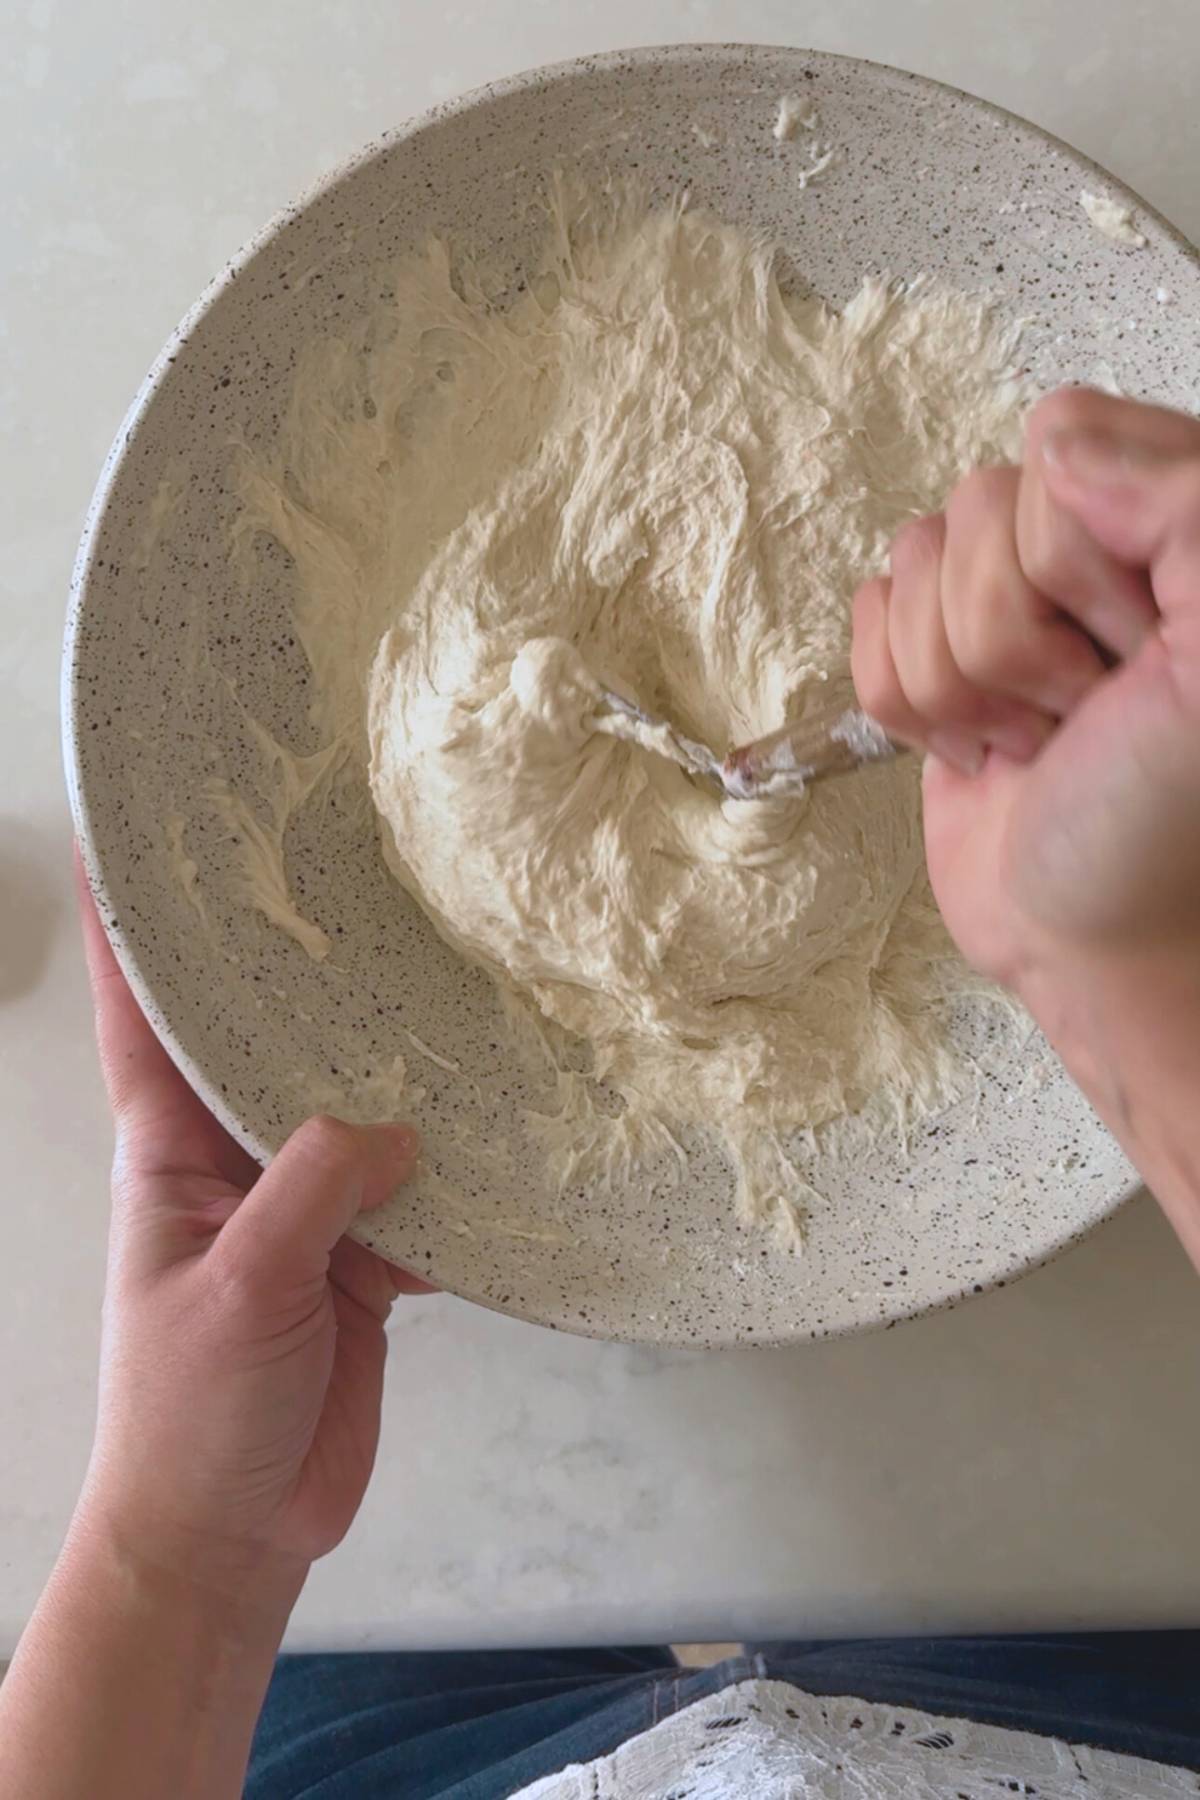
Add salt (and the reserved water)
Sprinkle salt over the dough and press it in with your fingertips. Add the reserved water and squeeze it through until the dough comes back together.
It may look like it's falling apart for a minute. That's normal. Keep working it until it turns cohesive again.
Then rest 30 minutes, covered, in that same warm spot.
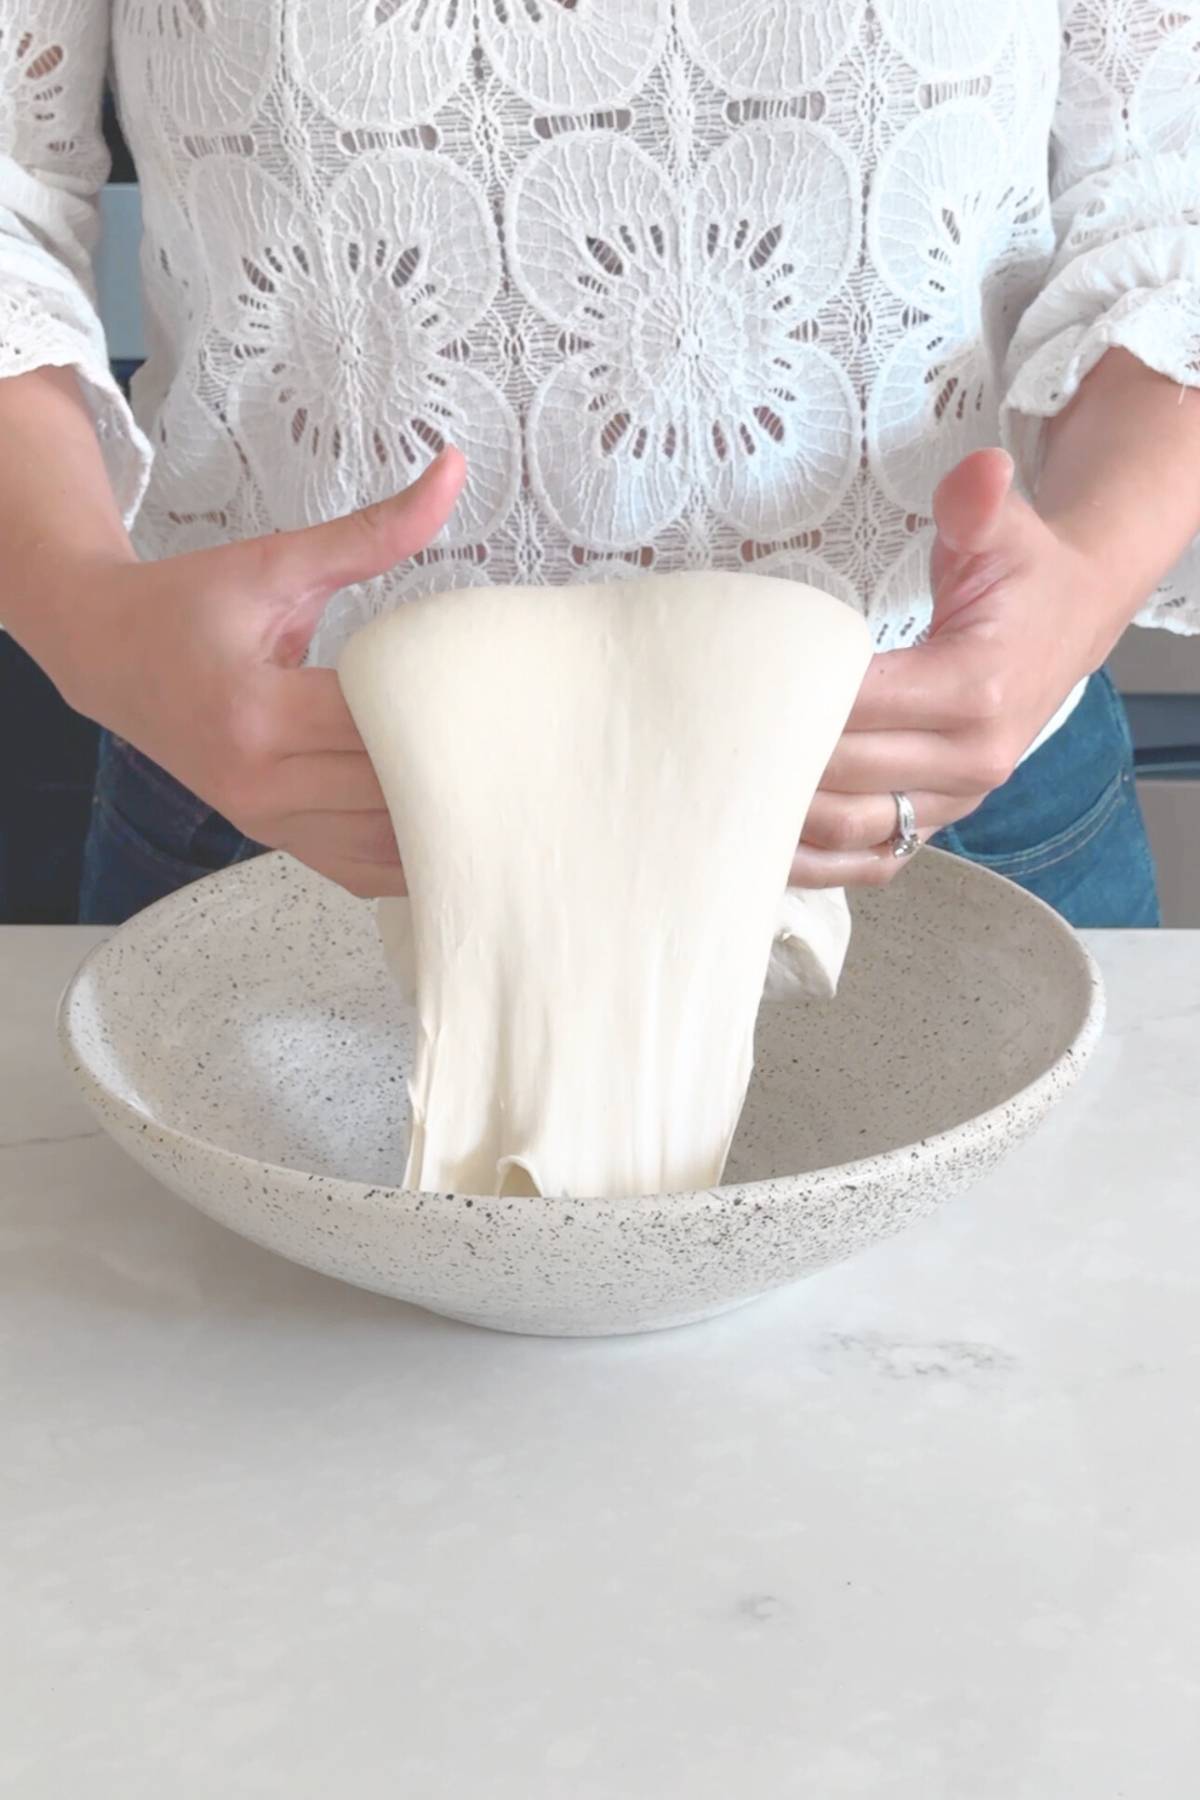
Stretch and folds
Do 4 sets total, each followed by a 30-minute covered rest.
You can do stretch and folds early (great when dough is still slack) and switch to coil folds later (gentler once it's puffier).
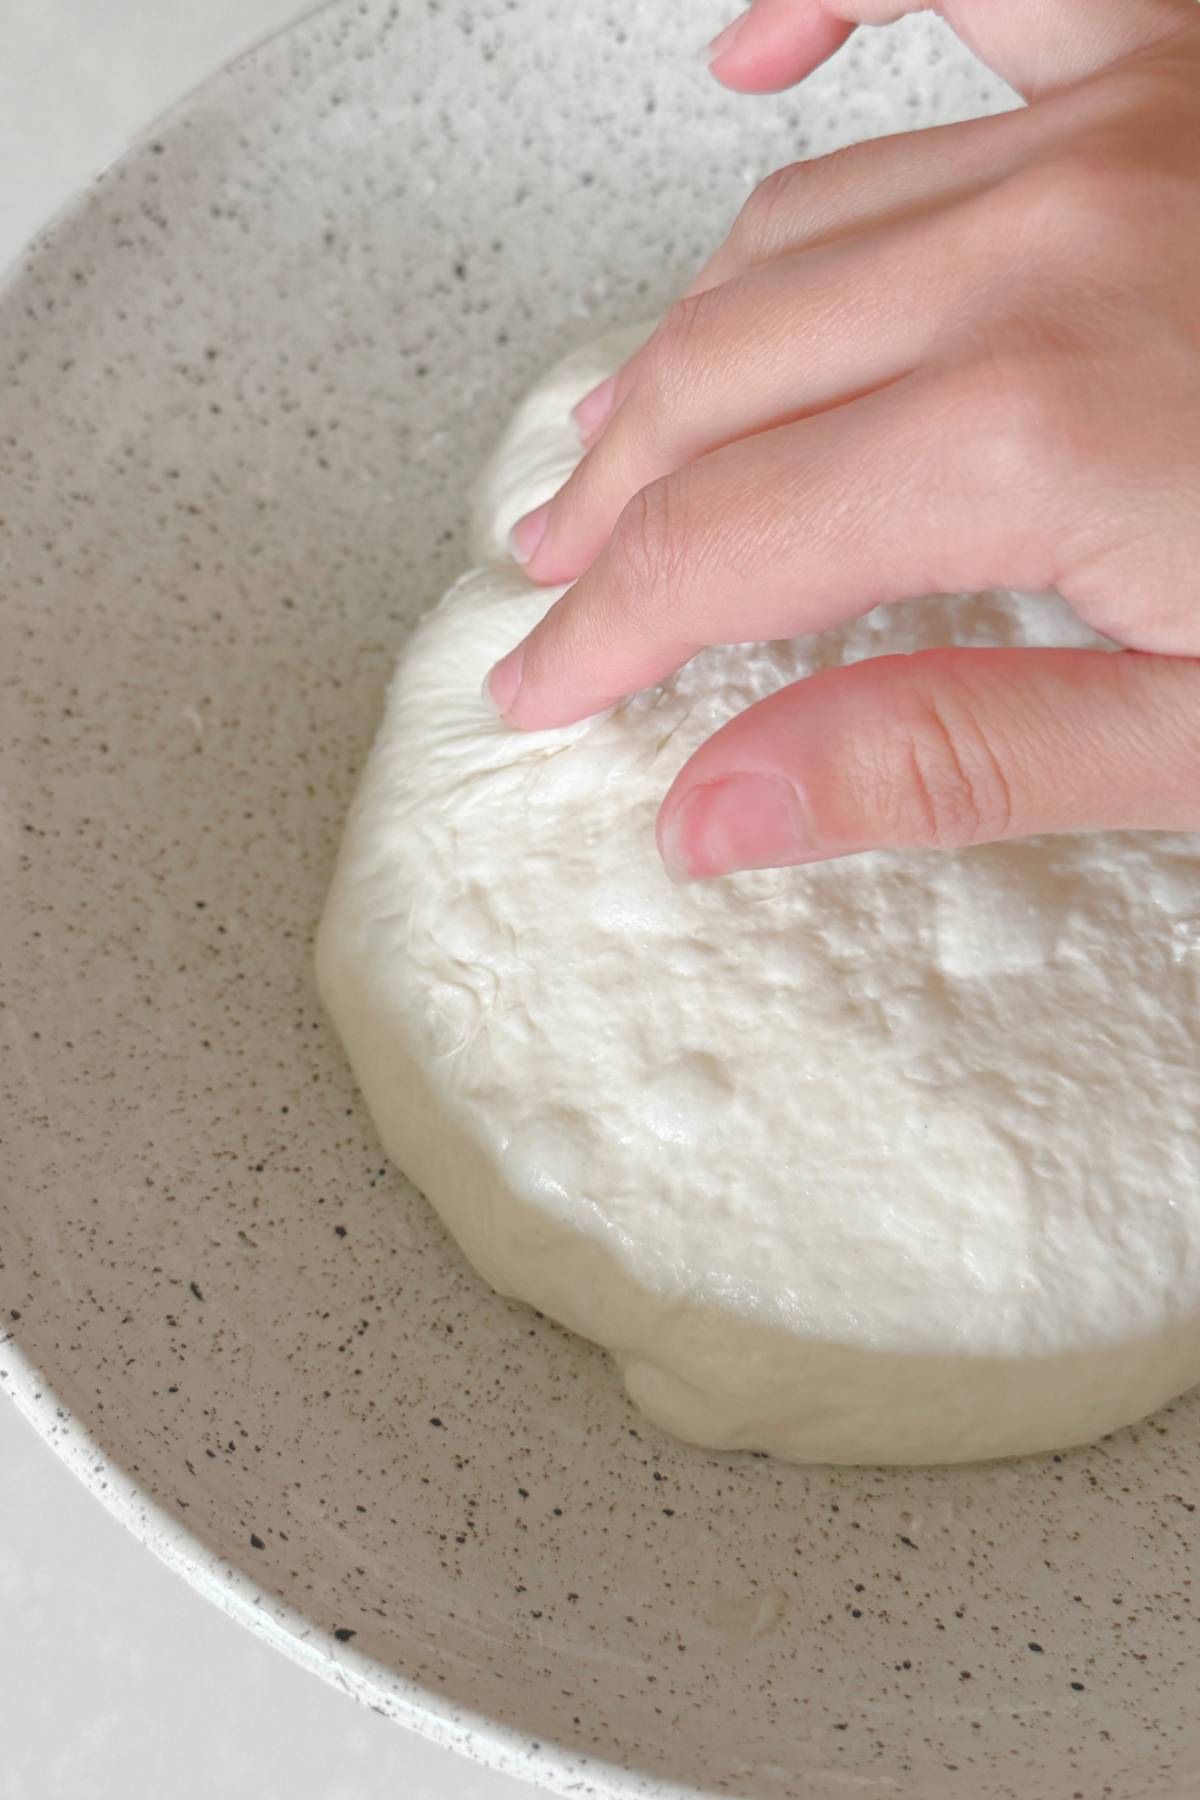
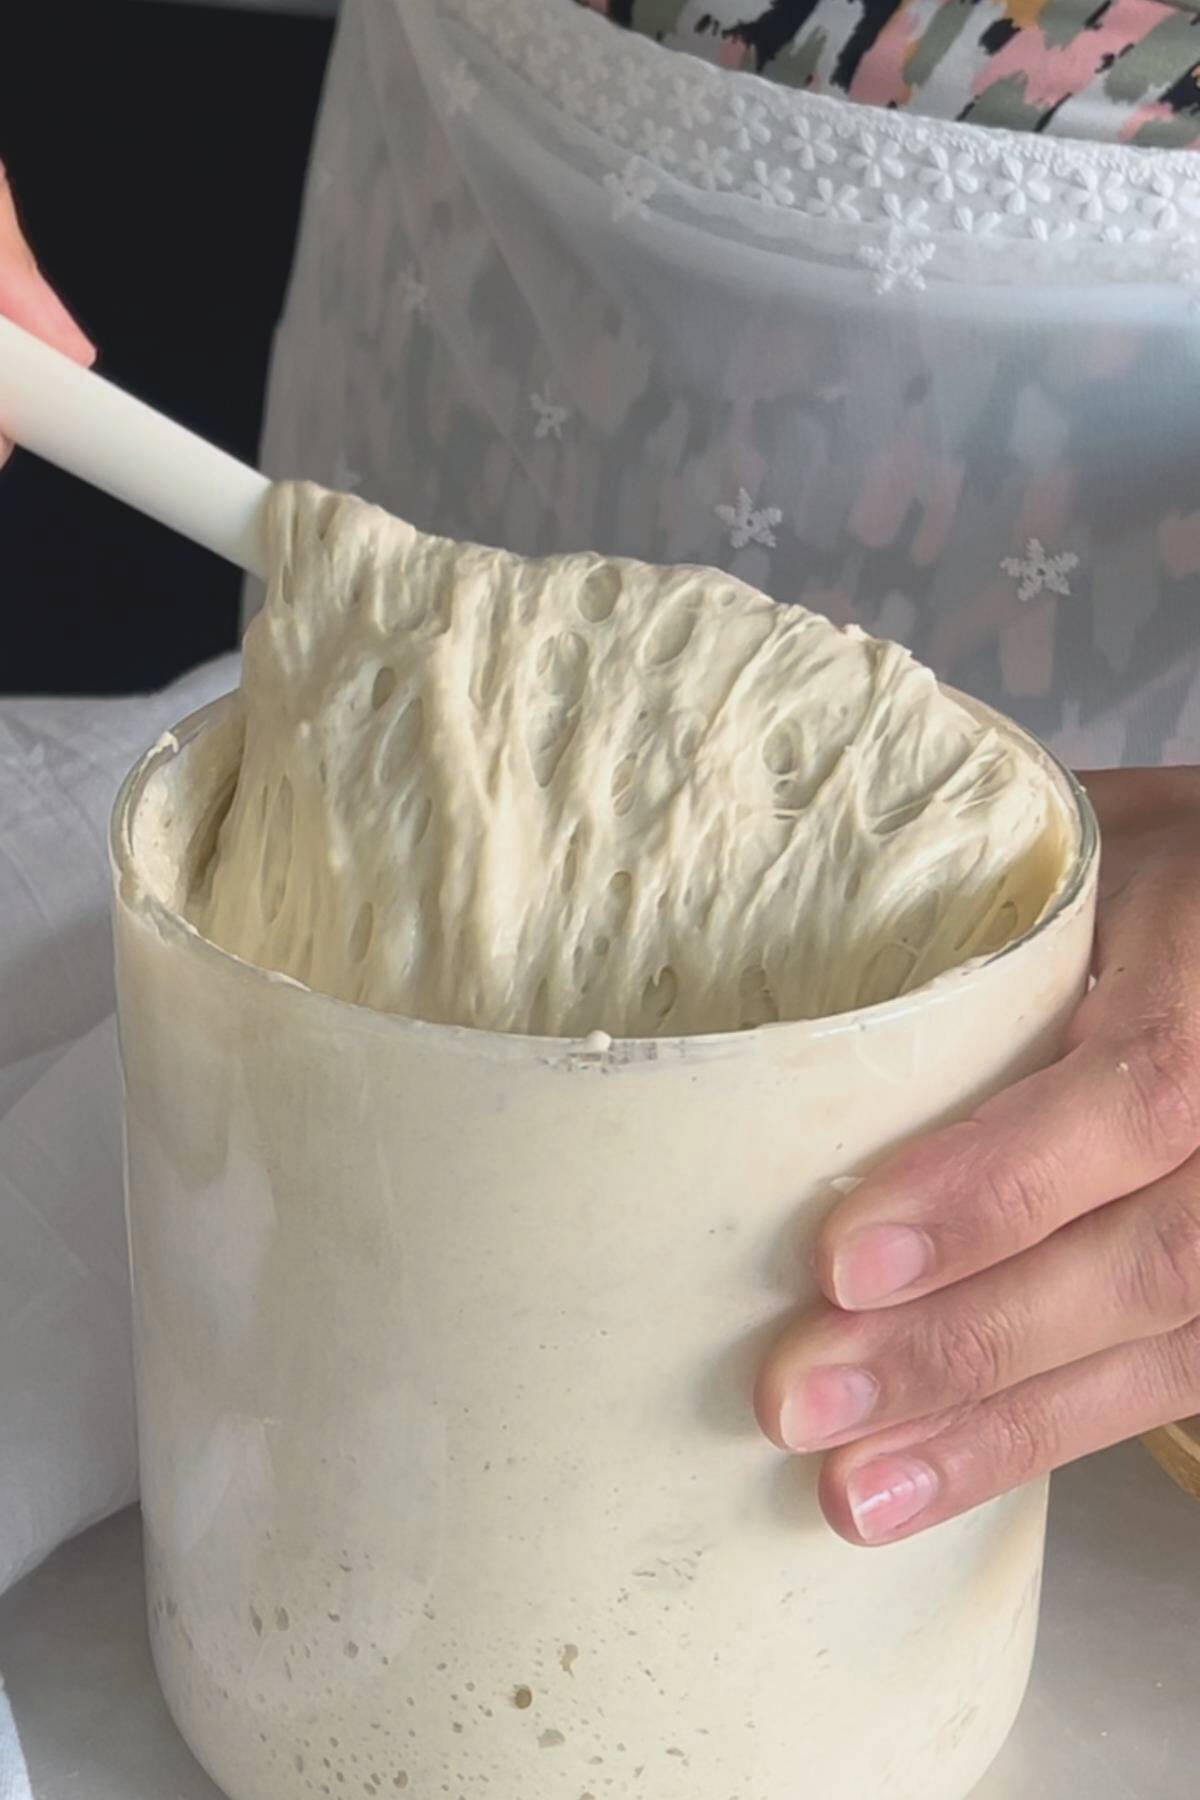
Finish bulk fermentation (first rise)
After your last set of folds, let the dough rest for the remainder of bulk fermentation.
Signs it's ready:
- smooth, not shaggy
- tacky, not overly sticky
- bubbles on the surface
- jiggles slightly when you move the bowl
- pulls away from the bowl instead of clinging
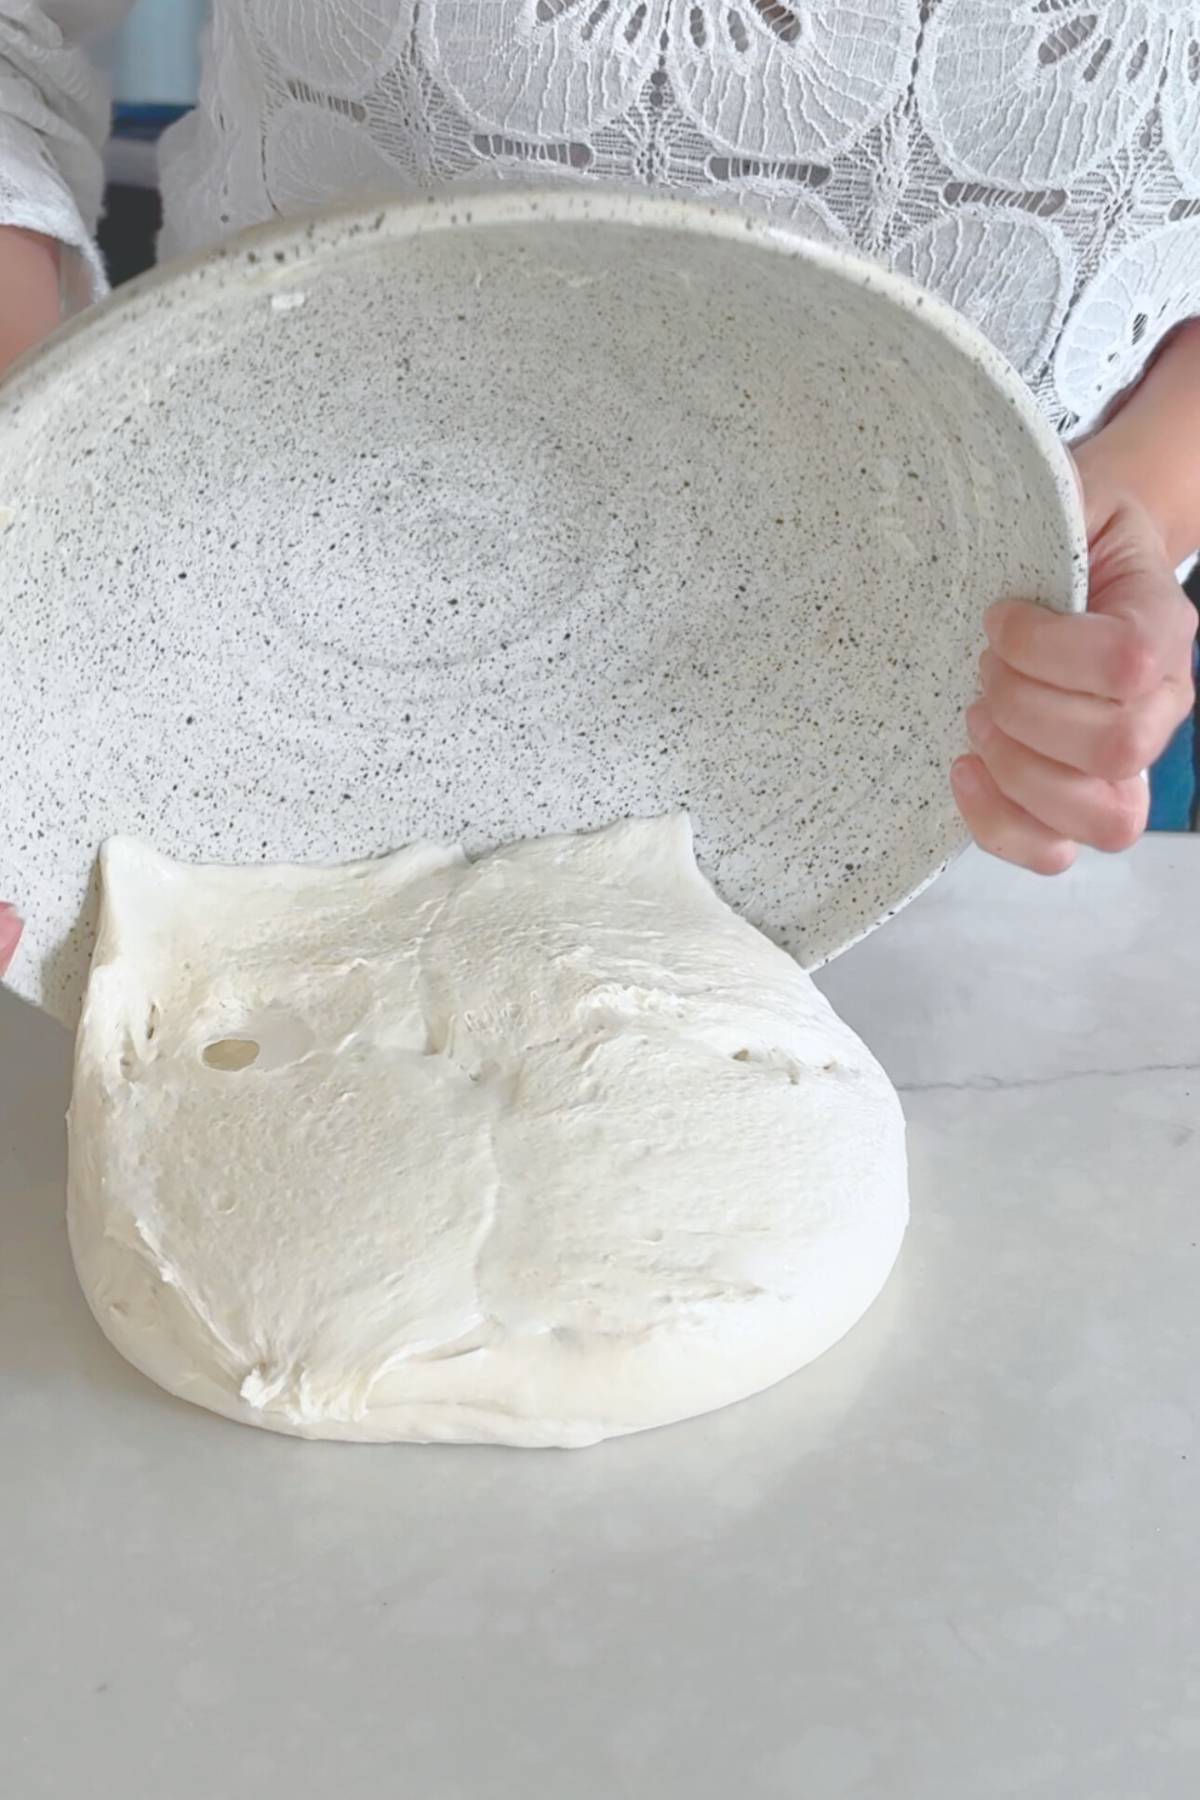
Pre-shape and rest
Turn the dough gently onto a clean counter. Gently round it into a tight ball and let it sit uncovered about 30 minutes.
Prepare your loaf pan by greasing it or using parchment paper liners.

Final shaping
You're aiming for a log (batard shape) that fits your pan lengthwise.
Flip the dough so the smooth side ends up on the outside. Gently tighten it into a log by folding, rolling, and sealing the seam
Place it seam-side down into a parchment-lined or lightly greased loaf pan.
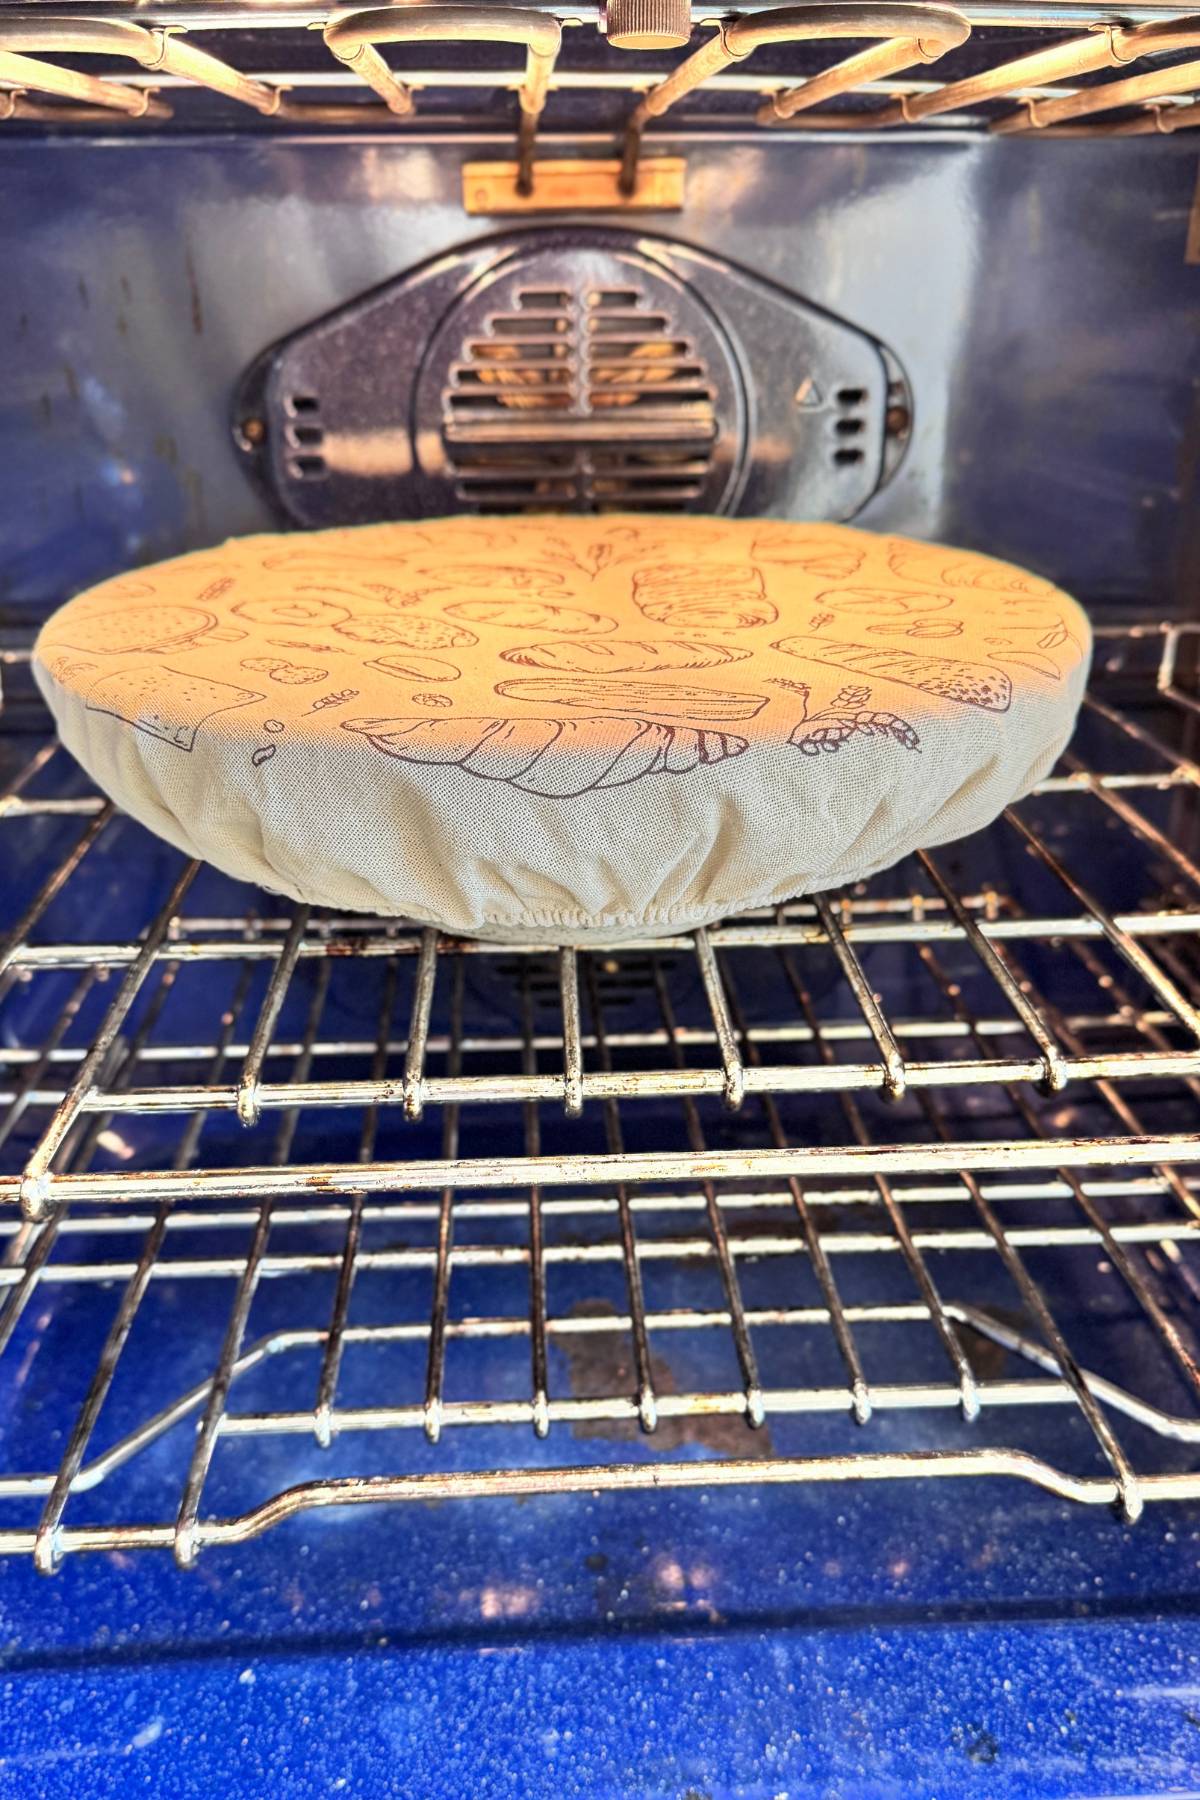
Second rise (proof)
Cover and let it rise 2-4 hours, until it looks puffier and lighter.
Or cover and cold proof (my favorite for flavor + easier scoring) by refrigerating 12-36 hours at about 35-37°F (2-3°C).
For easiest scoring, you can chill the dough in the freezer 30 minutes while the oven heats.
Score
When you are ready to bake, preheat the oven to 450°F (232°C), or higher if you are baking multiple loaves at once.
Then score with one main expansion cut. Shallow, decorative cuts are optional.
Cover with second loaf pan and bake
Cover with the second loaf pan, inverted like a lid.
Bake covered for 30 minutes.
Remove top loaf pan and continue baking
Remove the top pan and bake uncovered 10-15 minutes, until deeply golden.
Remove from oven and parchment
Internal temp should be at least 205°F. It should sound hollow when tapped on the bottom.
Remove the loaf from the pan and the parchment paper fairly quickly so the sides don't steam and soften.
Cool before slicing
Cool on a rack 3-4 hours before slicing so the crumb sets.
If you cut too soon, you'll think it's gummy, when it's really just not finished cooling.
Tips For Success Making Sourdough Bread Using The Two Pan Method
- Measure Precisely: Use a digital scale for all ingredients to ensure accuracy and consistency.
- Reserve some water when mixing: Keep 10% of the water during the first mix and fermentolyse, This will give you more control over the stickiness of your dough. Add it slowly when mixing in the salt if needed or reserve it to wet your hands during the process of stretch and folds and shaping.
- Temperature Control: Dough temperature can greatly affect fermentation. If your dough is warmer than 78°F (26°C), it will ferment faster than what is indicated in the instructions, and if it is colder, it will ferment slower, so plan accordingly.
- Loaf-pan scoring tip: Score along the length of the loaf, slightly off-center, so it opens cleanly without tearing the sides.
- Oven temperature: Every oven is different, so play with different temperatures, specially when baking in bulk.
- Loaf pan type: The results will depend on the type of loaf pan you use to bake your dough. Here is an article where I discuss different kinds of loaf pans to bake sourdough bread in.
- Tips for keeping the top lid in place: I do not use stainless steel clips or silicone bands to keep the top lids in place because I find them more troublesome than helpful, but you can try using them if you struggle to keep the top pans in place when loading multiple loaves in the oven.
- Patience: Sourdough takes time. Respect the process and give your dough the time it needs to develop flavor and texture. Do not rush these steps or you will end up with underproofed bread that is dense and dry, but also do not forget your dough or you might end up with overproofed bread that cannot hold its shape, it is flat and sticky
Storage For Sourdough Bread Made In Loaf Pans
The biggest rule for storing sourdough is to keep it dry. Moisture speeds up mold growth in preservative-free bread, and we don't want that.
At the same time, you don't want it sitting out in open air, because air dries bread out and makes it go stale faster. And once you slice it, even more of the bread is exposed, so it stales quicker.
Here is how to store it properly:
- at room temp: 2-3 days, stored cut side down, in a bread box or cotton bread bag
- in the fridge: up to 2 weeks in a zipper bag that's kept dry.
- in the freezer: up to 4 months, sliced or whole
Reheating Tips
- Slices: straight into the toaster from fridge or freezer
- Whole loaf: bake at 350°F (177°C) for about 20 minutes. Cover the top with foil to prevent it from getting too dark.
Substitutions
Flour swaps
- Bread flour to all-purpose: works, but expect a softer dough and slightly less height 1
- Adding whole wheat: start with 10-20% of total flour and expect it to ferment faster and feel tighter.
Water
- Filtered is ideal, but if you only have tap, let it sit uncovered a few hours to help chlorine dissipate (or use a filter).
Starter
- If your starter is sluggish, you can still bake, but plan for a longer fermentation and a loaf that may not rise as high.
- You can substitute the sourdough starter or supplement a sluggish one with commercial yeast.
- Follow my recipe for homemade artisan bread which uses only 4 ingredients: water, flour, salt and yeast.
- Or use my recipe for Easy Sourdough Discard Bread which uses both sourdough discard and yeast
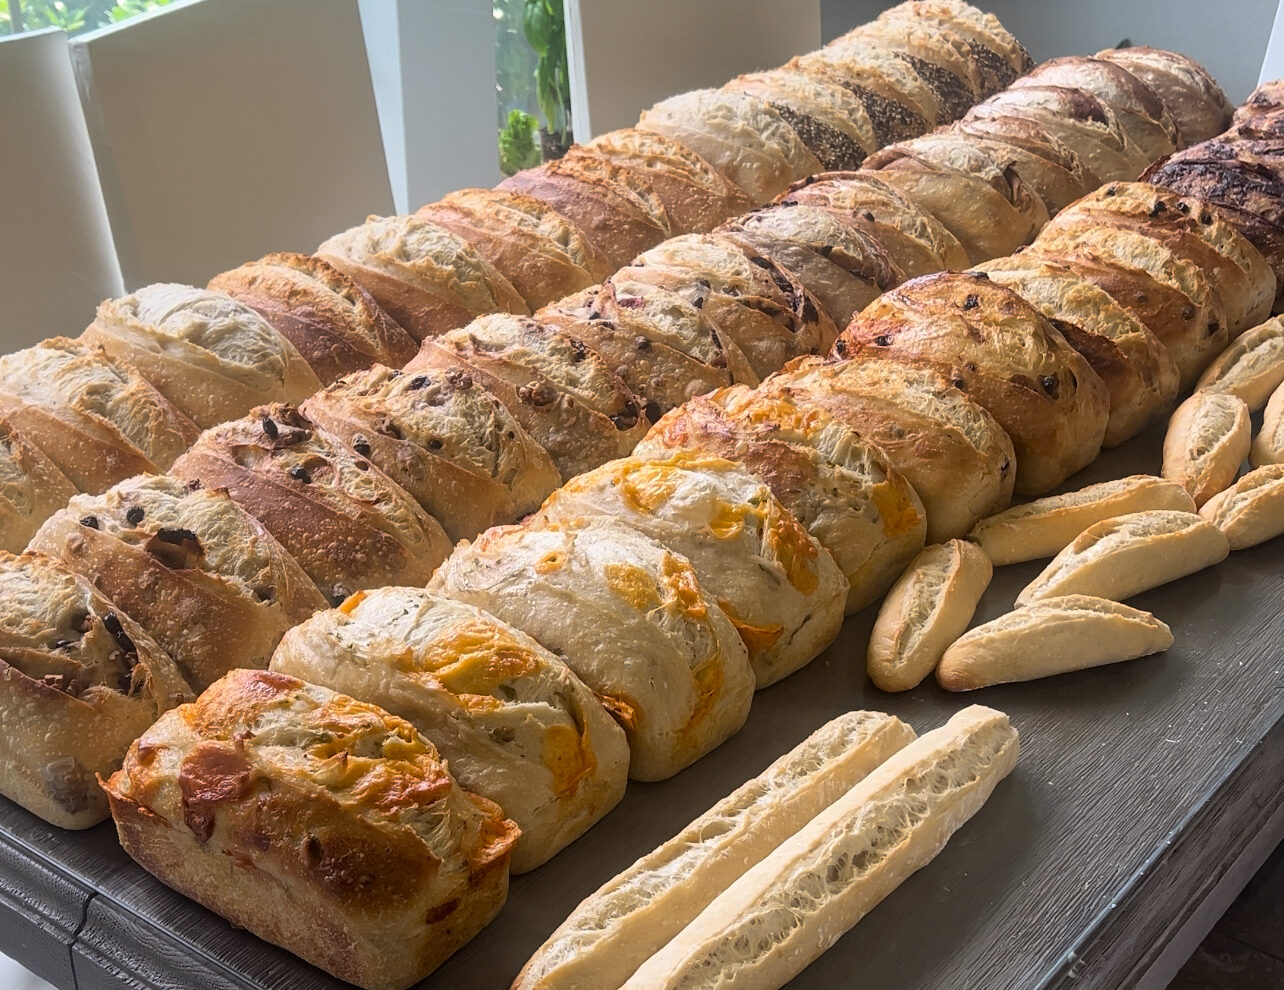
Want inclusions?
This dough can handle add-ins beautifully, and loaf pans make it extra practical for "sandwich breads with personality." Keep it simple:
- seeds: add during shaping or lamination
- cheese: cube it and fold it in gently
- dried fruit/nuts: add after the dough has some strength, so you don't tear gluten early
Just remember: add-ins can slow down fermentation a bit and make shaping feel trickier, so keep expectations realistic on the first try.
Frequently Asked Questions About Classic Artisan Sourdough Bread Recipe
You can bake in a loaf pan without the cover, but you'll lose steam. That usually means less rise and a thicker crust. If you only have one pan, you can try covering with a large oven-safe stainless bowl, but the two-pan setup is the cleanest.
It works best when they're identical. If the top pan is a different size and doesn't seal well, steam escapes and the method loses its advantage.
No. This is one reason this method feels safer than a Dutch oven. Your oven does the heating. The trapped steam does the expansion work.
Yes, and it's honestly convenient. Just cover it well so the top doesn't dry out.
You can, but scoring is easier when the dough is firm. The chill also helps the loaf hold its shape in the first minutes of baking.
A standard 9 x 5 inch pan is the easiest starting point for this dough size. If your pan is smaller, you may get a taller loaf but risk overflow. If it's larger, the loaf may spread more and look shorter. Either still tastes amazing.
Want to Save This Page?
Sourdough Bread In Loaf Pan
Ingredients
Ingredients To Feed Your Sourdough Starter
- 7 grams (1½ teaspoons) sourdough starter at peak
- 42 milliliters (about 3 tablespoons) filtered water room temperature
- 42 grams (about ¼ cup + 2 tablespoons) bread flour
Ingredients for a 900 grams loaf (pre bake weight)
- 472 grams (3 and ¾ cups) high-quality organic bread flour 13% or more protein content (You can substitute for All-Purpose Flour)
- 90 grams (½ cup) active sourdough starter at peak
- 328 milliliters (1 ¼ cups + 2 tablespoons) filtered water warm to the touch, not hot
- 10 grams (2 teaspoons) sea salt
Instructions
The Night Before
- The night before mixing, feed a portion of your starter at a 1:6:6 ratio: 7 grams starter, 42 milliliters water, and 42 grams flour. Cover loosely and leave at room temperature. Use in the morning after it has reached peak activity.
Mixing
- Reserve 10 milliliters of water.Begin mixing by combining the rest of the water (318 milliliters) with all the peaked starter in a large bowl until bubbly.
- Add the flour. Use the dough whisk to mix for about 2 minutes until all the flour is hydrated. The dough should feel shaggy at this point.
- Continue mixing using your hand for about 2 minutes. Leverage the sides of the bowl to ensure everything is well mixed.
- Now, pretend your hand is the dough hook in a stand mixer and use that motion to mix the dough for 2 more minutes.The dough should feel smooth now, but sticky.
- Let this mixture rest, covered with a damp kitchen towel, for an hour, in a warm spot around 78°F (26°C).
- After one hour has passed, add the salt and combine well.
- Add the 10 ml of water that you had reserved and integrate it thoroughly using your hands.Please note the dough will come apart, so keep working the dough until it comes together again into a smooth dough.
- Cover with a damp towel and rest for 30 minutes in a warm spot around 78°F (26°C).
Stretch & Folds or Coil Folds
- Perform a set of stretch and folds, then cover with a damp kitchen towel and rest for 30 minutes in a warm spot around 78°F.
- Repeat stretch and folds (or switch to coil folds) 3 more times (4 sets total), each followed by a 30-minute rest, covered, in a warm spot around 78°F (26°C).After each set, the dough should feel a little more airy and a little less sticky.
Finish The First Rise or Bulk Fermentation
- Cover with a damp kitchen towel and allow the dough to rest for the remainder of the first rise in a warm spot around 78°F (26°C). The first rise, or bulk fermentation, should end about 4 hours after mixing (1 hour or so after the last coil fold). The dough should not feel shaggy or sticky and it should not cling to the sides of the bowl. It should feel consistent, airy and jiggly, have bubbles all over the surface, and should release easily from the bowl.
Shaping
- Once bulk fermentation is complete, gently transfer the dough onto a clean, lightly floured surface, careful not to degas it.
- Using your hands and a gentle pushing and pulling motion, create a nice, smooth, tight ball.
- Allow it to rest on the counter/table at room temperature, uncovered, for 30 minutes.
- While the dough rests, prepare your proofing vessel.To proof directly in the loaf pan: Grease or line your loaf pan with parchment paper.
- After 30 minutes, gently grab the dough from the counter and turn it around on your open hands, so the smooth side is now on the palm of your hands.
- Bring your hands together and clasp the dough with your fingers.
- Rotate the dough a quarter turn, then repeat the clasping motion.
- Transfer the dough seam up into the prepared loaf pan.
Proofing
- Cover the shaped dough with a damp kitchen towel or a plastic cap and let it proof on the counter at room temperature for 2 to 4 hours, or until it slightly puffs up. For a deeper flavor and easier scoring, cover with a plastic cap or a bag, and cold proof in the refrigerator for 12–36 hours at 35–37°F (2–3°C).
Scoring
- Preheat your oven to 450°F (232°C).
- While the oven preheats, transfer the shaped dough (still in the loaf pan) to the freezer for 30 minutes. Once the oven is fully preheated, take the dough out of the freezer.
- To score, use a sharp lame, new razor blade, or sharp knife to make decorative, small, shallow cuts.Then proceed to make the expansion score, by making one or more deep cuts (about ¼ inch deep) on the surface of the dough.
Baking
- Cover the loaf pan with the second loaf pan acting as a lid, transfer to the oven and bake, covered, for 30 minutes.
- After 30 minutes, remove the top pan acting as a lid and continue baking for another 10-15 minutes until golden brown.
- The bread is done when it sounds hollow if tapped on the bottom and it reaches an internal temperature of 205°F or more.
Cooling
- Remove the bread from the oven and take it out of the loaf pan right away.
- Discard the parchment paper and place the loaf on a cooling rack to cool completely.
- Let it cool for 3 to 4 hours before slicing so the crumb can set and you do not end up with a gummy texture. If you sneak a slice while it is still warm, I completely understand! To be honest, I would be surprised if you didn't!
Preserving
- Keep your bread dry to maintain freshness. Store it at room temperature in a cotton bread bag or a bread box, cut side down, for 2-3 days. For longer storage, slice and refrigerate in a sealed bag for up to 10 days, or freeze for up to four months. Reheat frozen slices in the toaster or a whole loaf of bread in a 350°F oven, covered with foil for 20 minutes or so.
Related Recipes
Looking for other recipes like this? Try these:


subscribe to get my recipes
Join the movement Bringing Bread Back to every family table! Get recipes for homemade bread and other bakes delivered via email.
Maria Baradell says
My tried and true recipe for making sourdough bread using loaf pans and my Two Pan Method